How to create and use templates for installation
Create Template for Chai DSE
-
In the left panel, under Solutions, click Templates.
This opens Solution Templates in the right panel where templates can be created, applied, edited, deleted or copied.
-
Click Create.
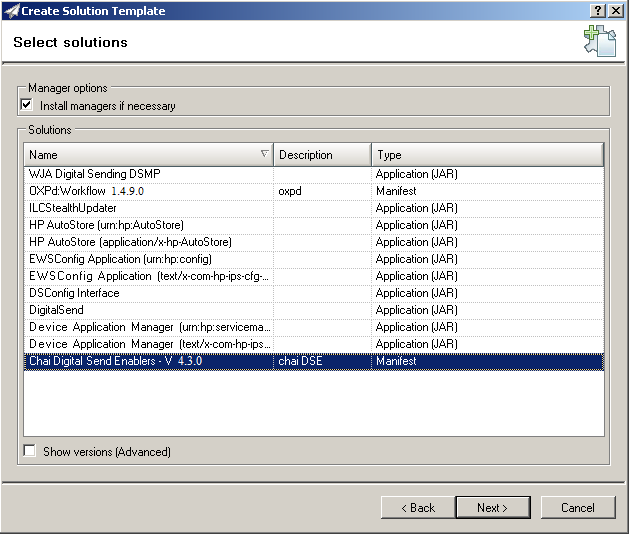
This will open the Create Solution Template window.
- Select Install and click Next.
-
Select Chai Digital Send Enablers-V.4.3.0.
This file will be installed when using the template.
- Click Next.
-
Select the settings for the solutions to be installed. Enter the proper Application URL.
This will be in the form of http://host name:3233/HPDS2/GetFile/chaixx, where host name is the IP address or DNS name of the AutoStore Server running a configuration that uses the HP OXPd component. If the actual machine name is used, note that the machine name or complete DNS path name will need to be used depending on the network configuration. Check with the system administrator. For chaixx, the “xx” refers to the Group xx where xx = 10, 20, 30, 40 or 50.
- Make sure that Activate Choice for Solution is pushed.
- Leave the user name and password blank, and click OK.
- Specify template name, and click Next.
- Confirm and create template.
Installation against a large number of devices can take several hours. In order to minimize downtime, installation can
be scheduled to occur during non-peak periods by selecting the Schedule option.
If this procedure is completed successfully, the message Template was saved successfully will be displayed.
How to create a template for OXPd:Workflow
-
In the left panel, under Solutions, click Templates.
This opens Solution Templates in the right panel where templates can be created, applied, edited, deleted or copied.
-
Select Create.
This will open the “Create Solution Template” window.
- Choose Install, and click Next.
-
Select OXPd: Workflow 1.4.9.0.
This file will be installed when using the template.
- Click Next.
-
Select the settings for the solutions to be installed. Enter the proper Application URL.
This will be in the form of http://<HOST NAME>:3233/HPDS2/GetFile/oxpdxx where “HOST NAME” is the IP address or DNS name of the AutoStore Server running a configuration that uses the HP OXPd component. If the actual machine name is used, note that the machine name or complete DNS path name will need to be used depending on the network configuration. Check with the system administrator. With “oxpdxx”, the “xx” refers to the Group “xx” where xx = 10, 20, 30, 40 or 50.
- Make sure that Activate Choice for Solution is pushed.
- Leave the user name and password blank, and click OK.
- Specify template name, and click Next.
- Confirm and create template.
Installation against a large number of devices can take several hours. In order to minimize downtime, installation can
be scheduled to occur during non-peak periods by selecting the “Schedule” option.
If this procedure is successful, the message Template was saved successfully will be displayed.
Create Template for Authentication Agent
-
In the left panel, under Solutions, click Templates.
This opens Solution Templates in the right panel, where templates can be created, applied, edited, deleted or copied.
-
Click Create.
This will open the Create Solution Template window.
- Click Install, and click Next.
-
Select the AutoStore Auth Agent corresponding to the group for which the template has been created.
Ensure that Show versions (Advanced) is selected. These files will be installed when using the template.
- Click Next.
- Specify template name, and click Next.
- Confirm and create the template.
Installation against a large number of devices can take several hours. In order to minimize downtime, installation can
be scheduled to occur during non-peak periods by selecting the “Schedule” option.
If this procedure is successful, the message Template was saved successfully will be displayed.