Entering Billing Codes
If billing codes are configured, the Accounting/Billing Code screen opens before a user accomplishes a task. The code entered here applies to copy and scan jobs. If overrides for Follow-You printing are enabled, a billing code which overrides the first can be entered and upon job release in the Follow-You Printing screen.
-
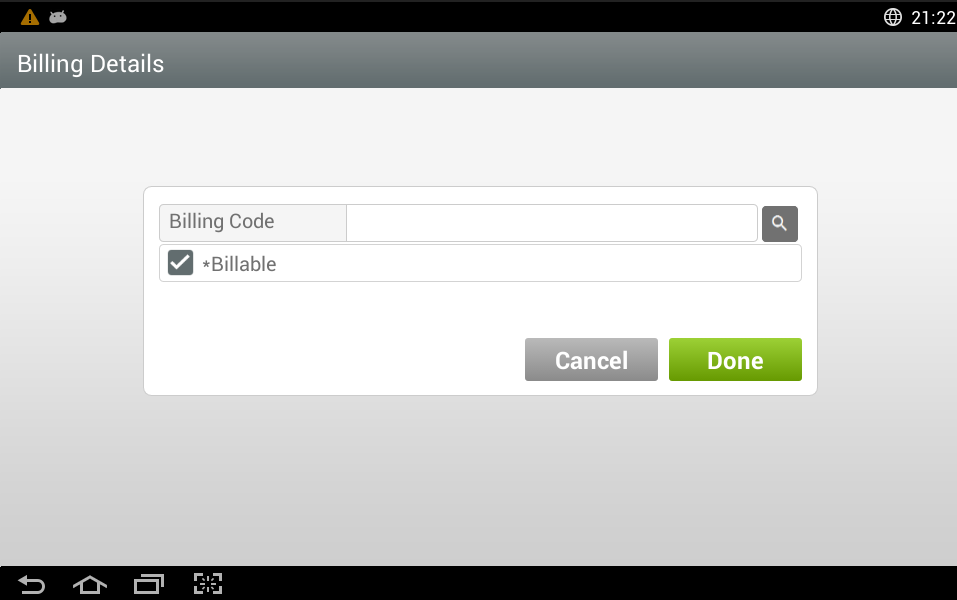
In the Billing Code field enter the billing code, if
required.
If you don’t know the code, select the Search button, represented by a magnifying glass icon. An onscreen keyboard displays, allowing you to enter search criteria. The keyboard can be dismissed to select from the resulting list of billing codes if it covers some of the results. The list initially contains all billing codes, and then narrows to a subset based on the search criteria entered. The list contains the first 100 codes that matched your search. Use swipe gestures to browse through billing codes and select the correct code, which then populates the Billing Code field.
-
If configured, select whether the job is Billable or not
by tapping the check box.
This option determines if the transaction is billed to a user, group, or department, or if it is only entered into the system for reporting purposes.
-
Select Done to continue.
If the Billing Code validation is enabled, the billing code is validated when you select Done. If you searched for a code and selected it from the list, it is validated immediately. Billing code validation is set in .
If the billing code you entered is invalid, try performing a search and selecting the code from a list instead.