Configure SP Mode Settings
This procedure describes how to configure Service Provider (SP) modes. The SP Mode settings are normally configured by the Configure and Reboot Action Action. You can use this procedure to configure settings manually when a device does not allow Device Registration Service to configure SP Mode settings through the Action.
This procedure requires working in Service Mode, which is typically performed by a Ricoh technician.
- On the Home screen, go to Printer (scroll screen) and press the Printer icon.
- Enter SOP Service Mode mode to complete the succeeding steps.
- Press System Sp (press 0 to change bit from 0 to 1, then # to save).
-
Press SP Direct.
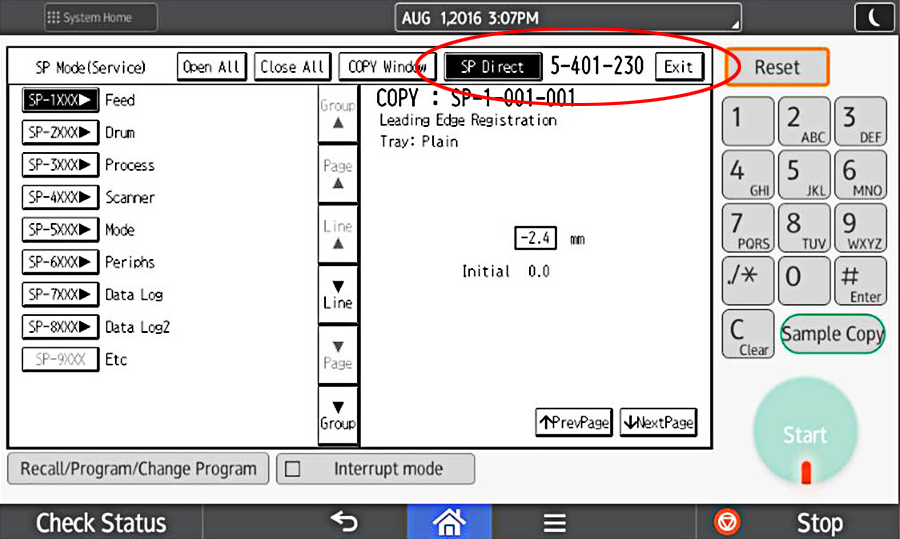
- In SP Direct type 5401230, then type #.
-
Set the LSB to 1 by pressing zero
0 on keypad in CAC configuration.
The last two digits should now be 1.
-
Type # to save your changes.

-
Go to , and on the User Management tab, set
Admin. Authentication to
On.

-
Go to , and on the Custom Auth. tab, enable LDAP
authentication.
 The label LDAP authentication in step 8 will be changed to Custom authentication after the machine is rebooted.
 - Configure the LDAP server.
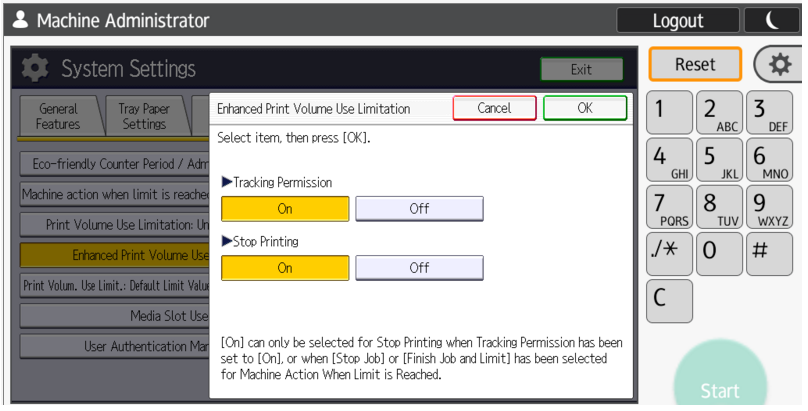
- Enable Machine action when limit is reached in System Settings (Administration tools).
Set this to Stop Job or Finish Job and Limit.

-
Enable the network by setting .

-
Turn on Tracking Permission.
The authentication logic customization feature becomes valid when the following condition is satisfied.