Add Site Bindings in IIS
Do the following to add certification and site bindings in IIS:
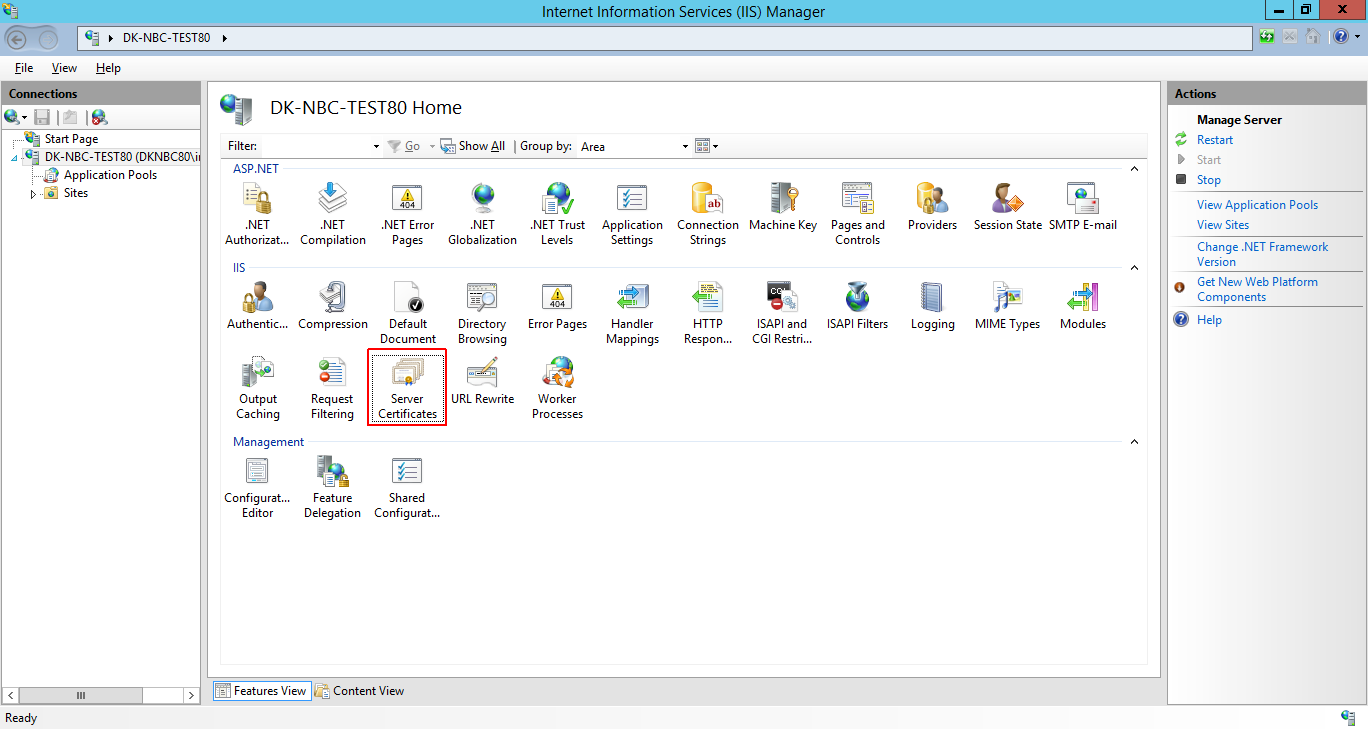
- Launch IIS Manager, and select the server node.
-
In the IIS section, double-click Server
Certificates.
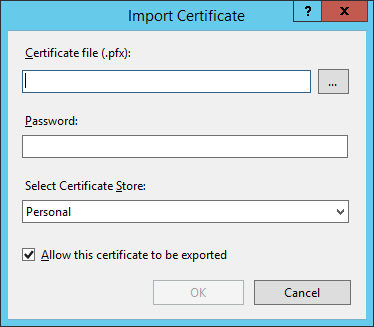
- In the Actions pane, click Import to open the Import Certificate dialog box.
-
Click the browse (...) button and locate the certificate
(.pfx) file, and then click
Open.
-
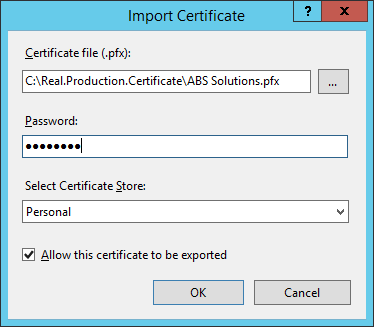
Enter the Password for the certificate, and click
OK.
-
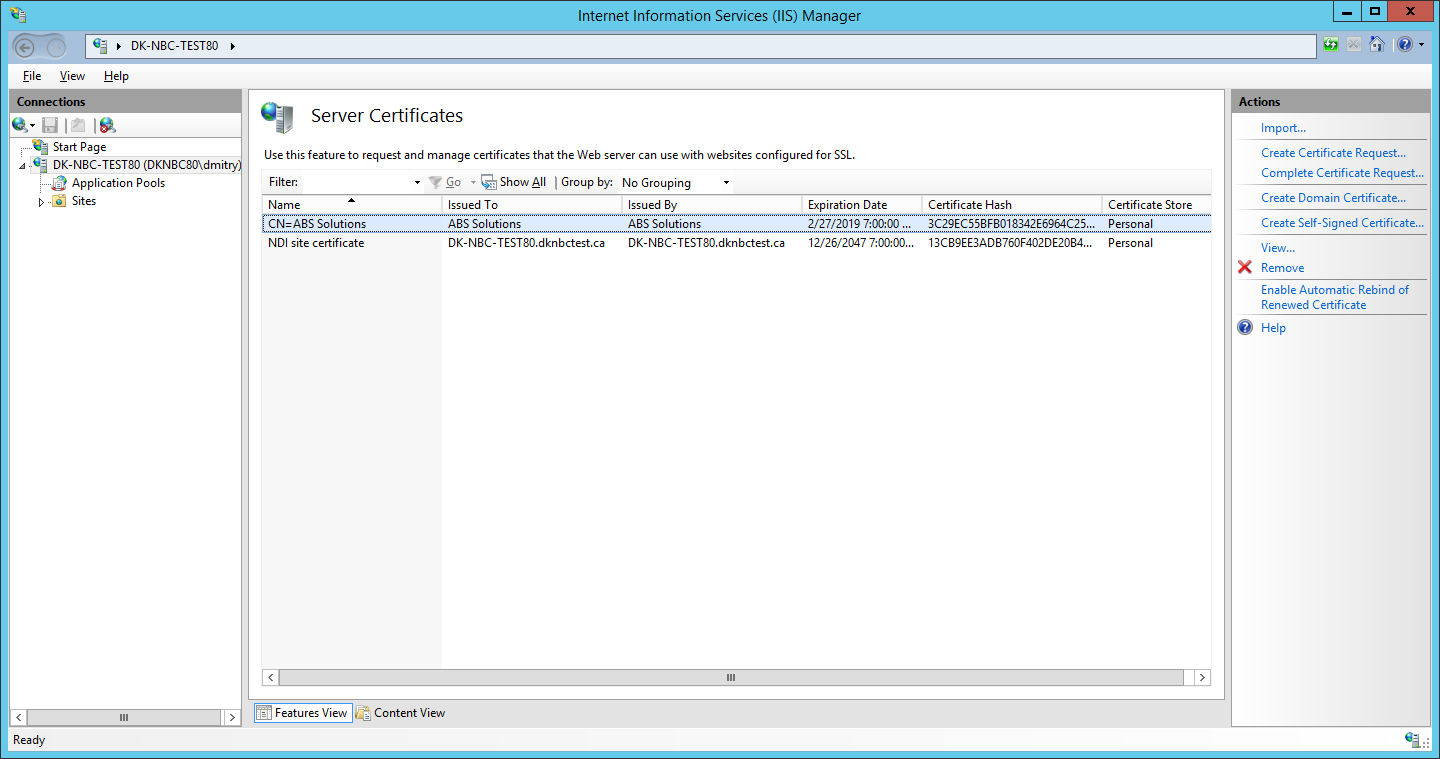
The Server Certificates list should now show the installed
certificate.
-
In the Connections menu, under
Sites, click the BusinessConnect site, and then click
the Mobile Server nod, and then click Bindings in the
Actions pane.
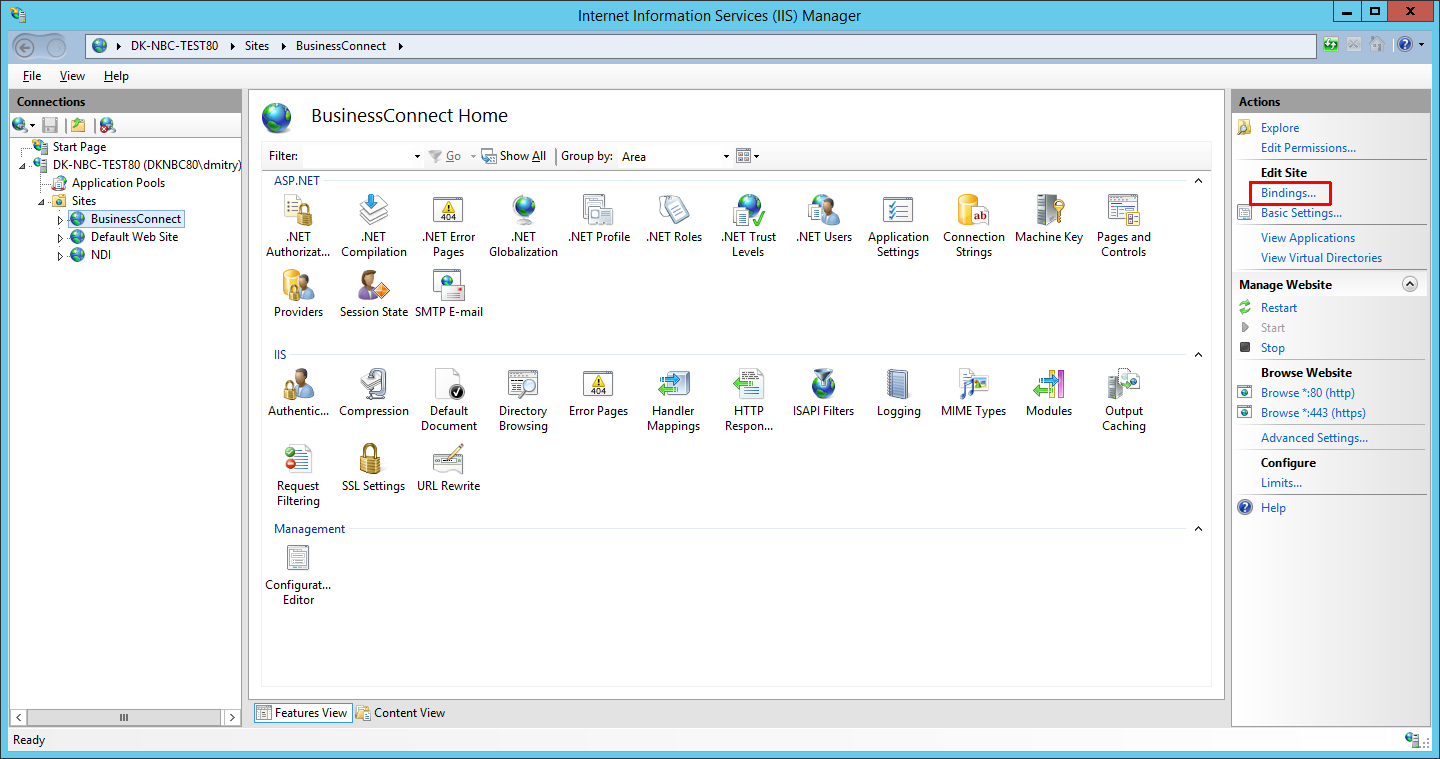
The name of the Mobile Server may vary. -
In the Site Bindings dialog box, click
Add.
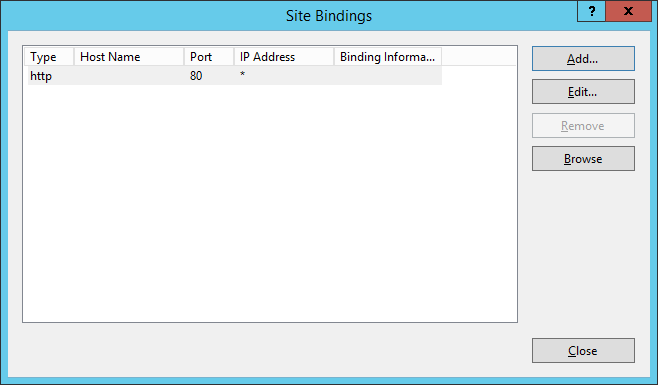
The Add Site Binding dialog shows up. -
In the Add Site Binding list, do the following:
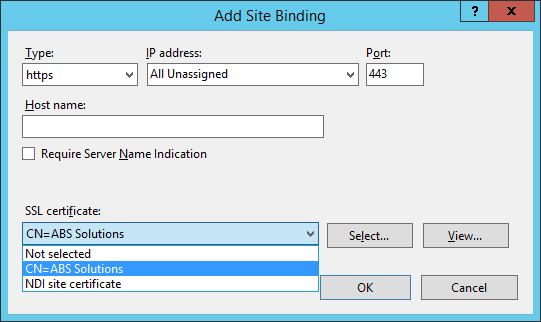
- Select https in the Type list.
- In the IP Address list select All unassigned.
- If you are using Server Name Indication (SNI), then enter the Host name that you are securing.
- If you are using Server Name Indication (SNI), then select Require Server Name Indication.
- Select the appropriate certificate from the SSL certificate list
- Click OK.
-
The list in the Site Bindings dialog box shows both the
http (80) and https (443)
bindings.
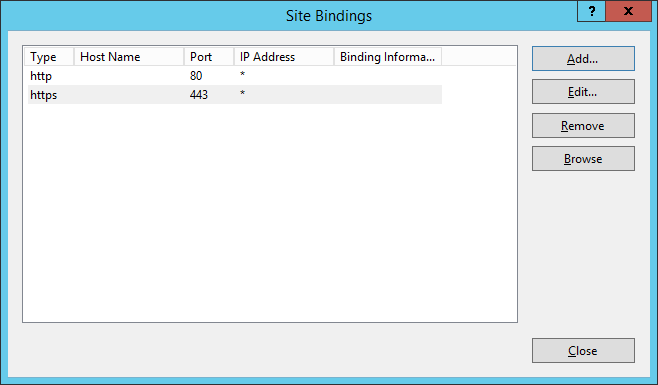
- Click the Close button.
