Connect the Ethernet Card Reader
This procedure provides the basic steps for connecting an Ethernet Card Reader to a printer.
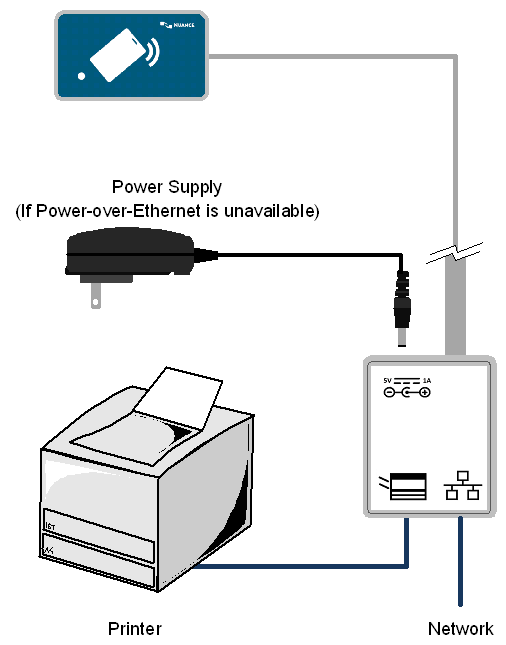
The following diagram shows the physical hardware connections:

To connect the Ethernet Card Reader, do the following:
- Disconnect the existing network cable from the printer and connect it to the Network port on the card reader.
- Connect the provided Ethernet cable to the printer’s network jack and the Printer port on the card reader.
- If the network does not supply Power-over-Ethernet, attach the separate power supply to the card reader.
- Secure the card reader near or on the printer using the provided self-adhesive Velcro strips.
- Secure the card reader cables using the cable ties and self-adhesive cable tie mounts.
