Configure from the Internet Services Interface
- Open a Web browser and enter the URL http://<MFP IP address> in the Address field.
- Select the Properties tab, and log in with your User ID and Password when prompted.
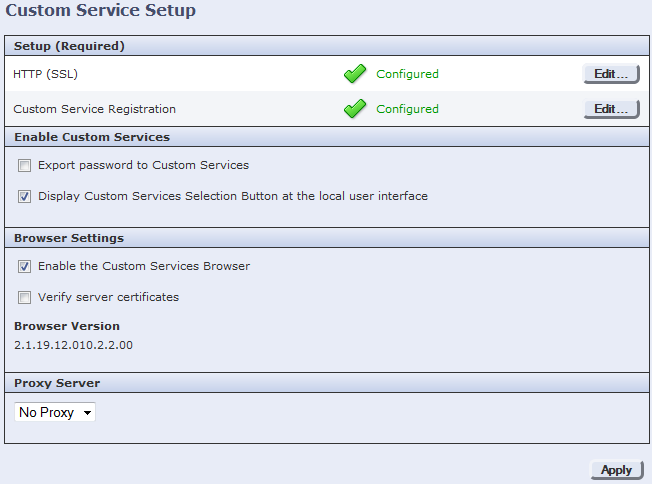
- In the left pane, click the General Setup folder, then select Custom Service Setup.
-
Click Edit beside the HTTP (SSL) option.
-
Ensure the Secure HTTP (SSL) option to
Enabled (it is by default), then click
Save to return to the Custom Service Setup
screen.

- Click Edit beside the Custom Service Registration option.
-
Click Enable All, then click
Save.
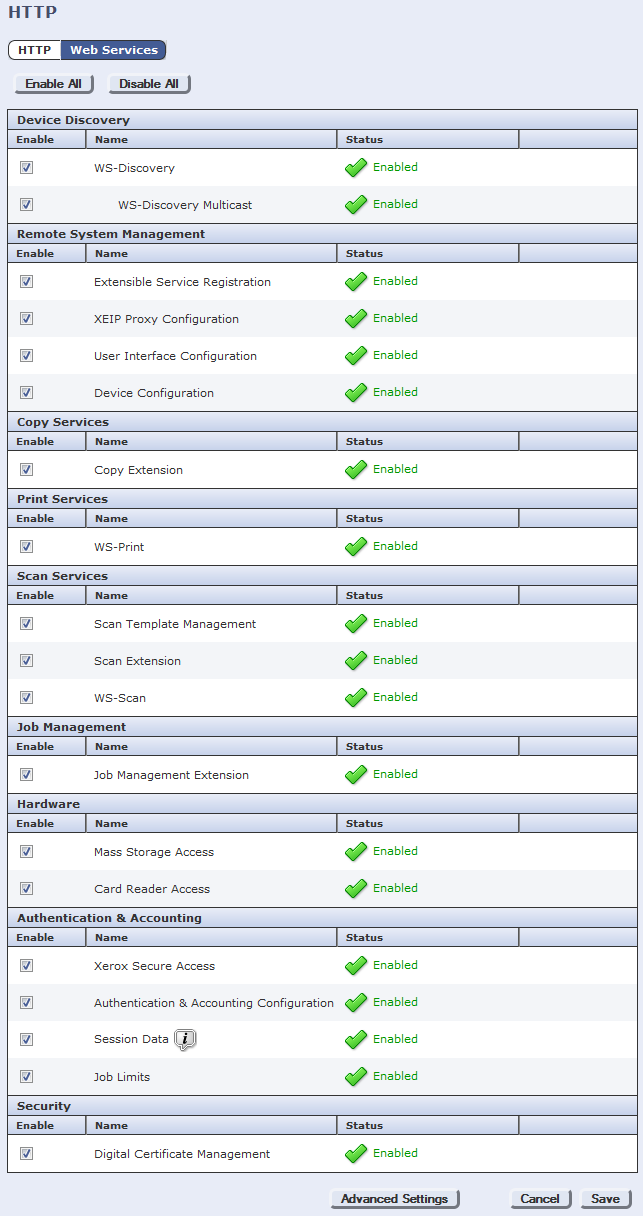 Ensure that both Authentication & Accounting Configuration and Job Limits are enabled. They are enabled by default. These services must be enabled via the Internet Services interface—not through the physical device. If these services are not enabled, errors occur when initializing the Xerox embedded device in System Manager, causing the Copy Stop feature to not work. Job Limits is not supported on all Xerox devices.
 -
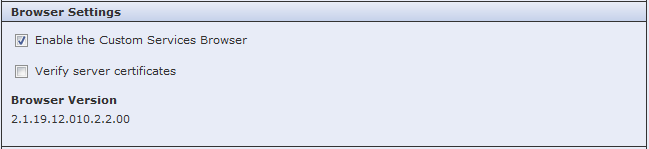
In the Browser Settings section on the Custom Service Setup page, ensure the
Enable the Custom Services Browser check box is
selected (it is by default), and click Apply.
- In the left pane, click the Security folder, then the Authentication subfolder, and then Setup.
-
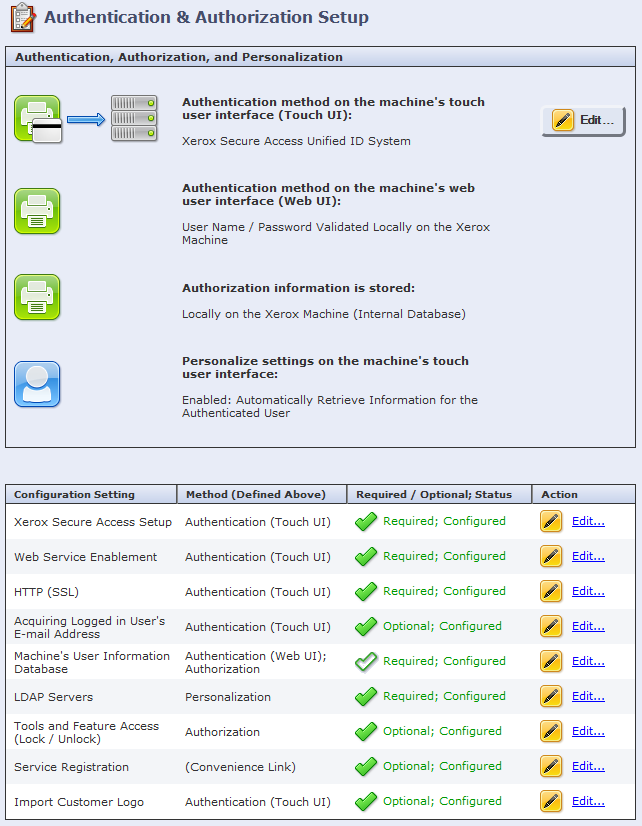
On the Authentication & Authorization Setup page, click
Edit to change the Authentication method.
 If the copier has not been previously configured, you may need to click the Next button (instead of Edit) and then work through a wizard to configure the copier.
 -
On the Authentication, Authorization and Personalization page, do the
following:
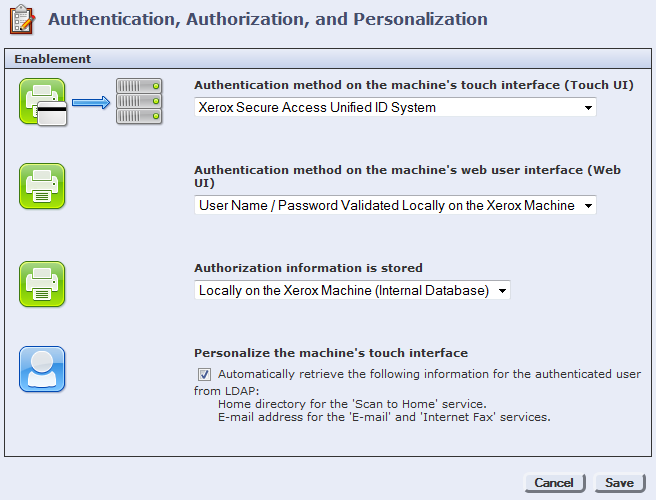
- Select Xerox Secure Access Unified ID System from the Authentication method on the machine’s touch interface list.
- Select User Name/Password Validated Locally on the Xerox Machine from the Authentication method on the machine’s web user interface list.
- Select Locally on the Xerox Machine from the Authorization information is stored list.
- Click Save to apply the changes.
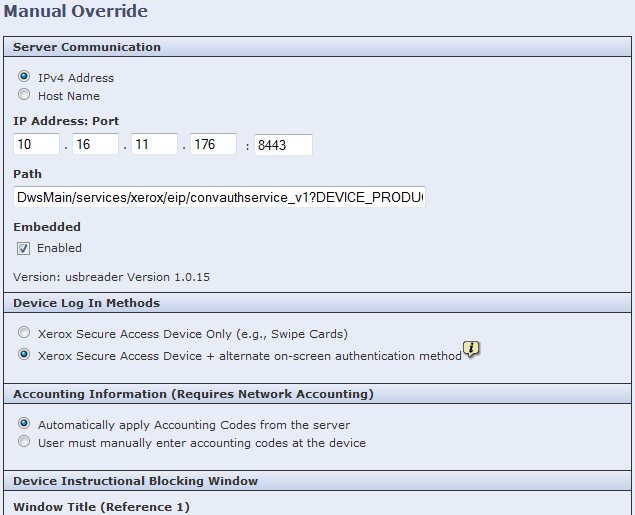
- On the Xerox Secure Access Setup page, click Manually Override Settings.
-
Set the following:
-
In the Server Communication section, select the
Enabled check box under the Embedded option
if you use a standard Equitrac card reader. If you use a generic card
reader, clear the check box.
The Embedded option must be Enabled on Xerox MFPs running ECSP firmware version 1.5 or 2.0 in order for the attached Equitrac card reader to operate normally.
- In the Device Log In Methods section, select the preferred method.
- In the Accounting Information section, select Automatically apply Account Codes from the server.
-
In the Server Communication section, select the
Enabled check box under the Embedded option
if you use a standard Equitrac card reader. If you use a generic card
reader, clear the check box.
- Click Save to apply the changes, then click Close.
- Click Close again to return to the Authentication & Authorization Setup page.
-
In the left pane, click the .
-
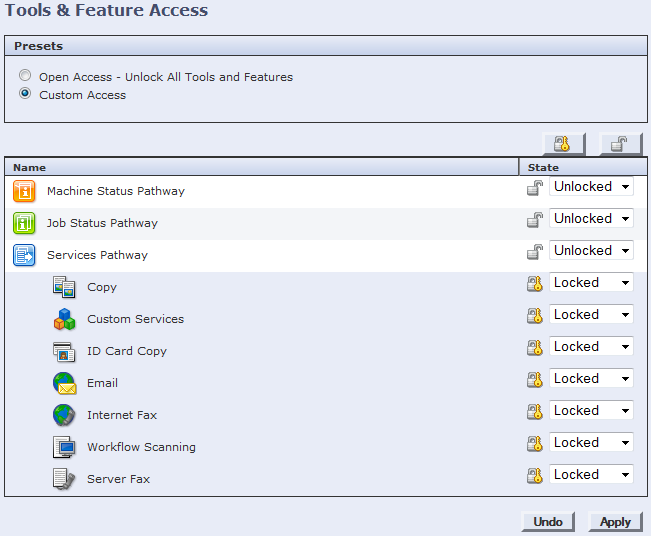
In the Presets section, select the Custom Access option
to select the services you want to control access to.
- Unlocked - the service appears on the control panel and is accessible without authentication.
- Locked - the service appears on the MPF control panel, but cannot be accessed until the user authenticates.
- Hidden - the service does not appear on the control panel.
- Click Apply to complete the configuration of this MFP.
- Log out of the MFP’s configuration utility and close the web browser.
-
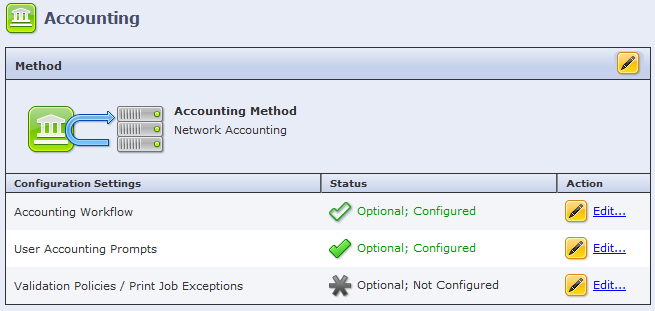
From the left pane, go to .
-
From the Accounting Workflow row, click Edit.
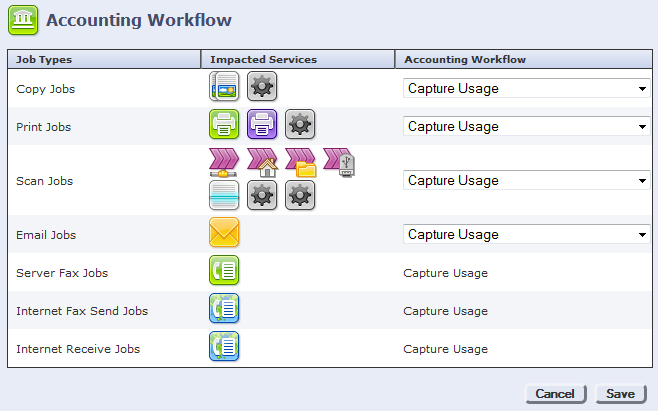
- Select Capture Usage from the list of any service from which you want to record transactions.
- Click Save.