Setup Zoned OCR dialog box
Image pane
Image pane displays the image and allows you to navigate through its pages (if it is a multipage document) and select zones. The image is displayed after applying preprocessing options specified in the Advanced tab. Select any number of zones by holding down the right mouse button and dragging the pointer.
In the right-top area of the dialog you can read the following information: zones on the selected page to recognize with their alignment, zones that will not be recognized on this page.
Preview buttons
Buttons at the top-left of zones' editor are used for previewing input images.
| Button | Description |
|---|---|
|
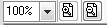
This section is used for zooming the image in/out. |

|
Use these buttons to set up image alignment: fit to screen, fit to width, fit to height. |

|
Use this button to enter selection mode, in which you can select one or more zones. |

|
Use this button to enter creation mode, in which you can create new text
zones. The selected zones have to fulfil the following conditions:
|

|
Use this button to remove selected zones. |
Image
Select an image and a page for displaying in the preview pane.
| Option | Description |
|---|---|
| Image file | Enter the path to the image file. |
| Page | Select the page number in this field or use  and and  navigation buttons for
page selection. These buttons are enabled only if the document contains more
than one page. navigation buttons for
page selection. These buttons are enabled only if the document contains more
than one page. |
Zone
Set parameters for a specific zone. If no zone is active, the section is disabled. The zone may be chosen with the mouse cursor in the preview pane or from a drop-down list.
| Option | Description |
|---|---|
| Name | Enter the zone name. Every zone must have a unique name. The names are used for RRTs. You can use any symbols in the names of zones except for the sequence '//' and all new line characters. Equal names and empty names are prohibited. |
| Type | Specify the type of the recognized block. You can select one of the
following values:
|
Tabs
| Tab | Description |
|---|---|
| Pages Tab | This tab allows you to specify pages of the input document on which the zones should be recognized. |
| Validation tab | This tab allows you to set verification of the found zone values. Only those values are considered to be found within a zone that meet the validation criteria for that zone, otherwise they will be ignored. |
| Location tab | This tab allows modifying the selected zone coordinates and preferable measure unit. |
| Test tab | This tab allows you to test the recognition. |
Export zones to a CSV file — Select this check box if you want to export the recognized zones' names and values into a CSV file. By default this box is unchecked.