How to install the KYOcapture MFP application
In order to complete the steps that are outlined below, you will need J03_E000003003.pkg (Version J03_E000.003.003), which is located in the
installation_directory\Distributables\Kyocera MFP (HyPAS) folder.
- Select an empty USB flash drive for installation of KYOcapture, and copy the installation file to the USB flash drive.
- At the MFP operation panel, open System Menu by pressing the System Menu button at the top-left corner of the MFP panel.
-
Scroll to next page and press the Application button.
If the MFP device prompts for authentication, authenticate with an administrator account.The application screen lists all applications installed on the MFP.
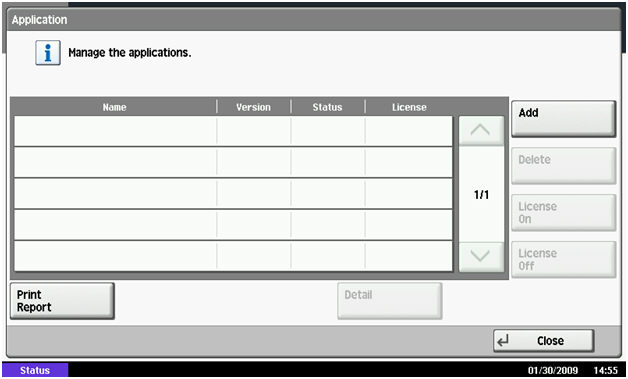
- The application already has an entry for the KYOCapture application, then select the entry and press the Details button to verify the version. If a previous version is currently installed, then proceed through the following steps to update the application.
- Press the Add button to open Application-Add screen.
-
Insert the USB flash drive into USB slot at the side of the panel.
Within a few seconds, the MFP will display ‘KYOcapture’ in the list of applications found on the USB flash drive.
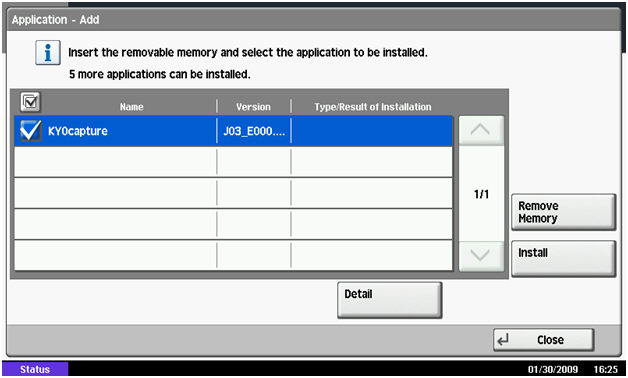
- Select KYOcapture and press the Install button.
-
When prompted to confirm, press Yes.
The MFP will confirm that the application installed correctly. Then, press the ‘Remove Memory’ button. After the MFP confirms that it is safe to remove the USB memory device, remove it from the MFP.If an existing version of the KYOCapture application was already installed on the device, then the ‘Type/Result of Installation’ column will show ‘ Upgrade program’ indicating that the current version will be updated.
- Press the Close button to exit back to Application page.
After you complete this procedure, follow the procedure How to license the KYOcapture application to license the application.