Create a sample advanced report
Use the section below to see a sample procedure for creating a report. For example, suppose you have data about orders processed in different countries and need to set up a record to display orders data filtered by countries and by products.
You can configure sending a report where orders are filtered by countries and by product. This report is to be sent to several emails. The process can be split into three parts.
Prepare data for a report
- Create an Excel file with two tabs: Reports and Emails.
-
On the Reports tab, add the following columns:
- ID
- ReportName
- StartOn
- Interval
- FromDate
- ToDate
- DeliveryMethod
- FolderName
- FileName
- DriverGroup
- ProductID
- ShipCountry
- EmailSubject

-
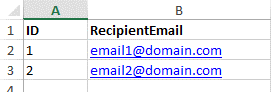
On the Emails tab, add the following columns: ID and
RecipientEmail.
In the example above, ReportInstance1 with ID = 1 will be saved to file (DeliveryMethod is set to File and FolderName is specified) and will be filtered only for USA for two products.ReportInstance2 with ID = 2 will be delivered via emails (DeliveryMethod is set to Email and EmailSubject is specified) and will be filtered only for Germany for two products.
ReportInstance3 with ID = 3 will be delivered via emails (DeliveryMethod is set to Email and EmailSubject is specified) and will be filtered only for UK for one product.
Note Instead of using an Excel file, you can use a database with required tables and specify all necessary data there.
Create records for report generation and emails
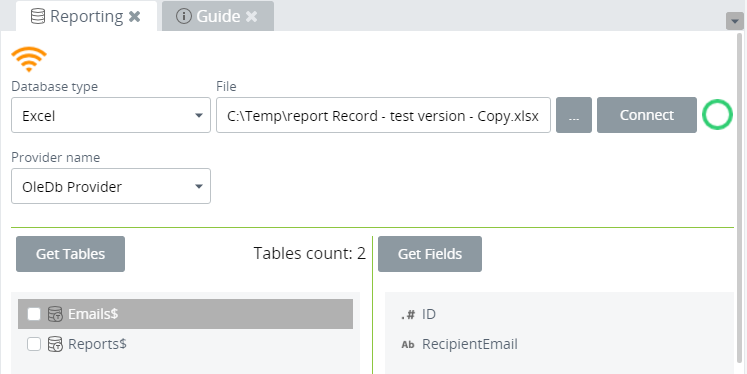
- Create a data source based on the Excel file created in the previous step. In Studio, on the Documents Tree, navigate to Data sources, right-click and select New Data Source.
-
Configure the data source as
usual and click
Get Tables. The list of
tables on the list shows the Excel tabs: Reports and Emails.
-
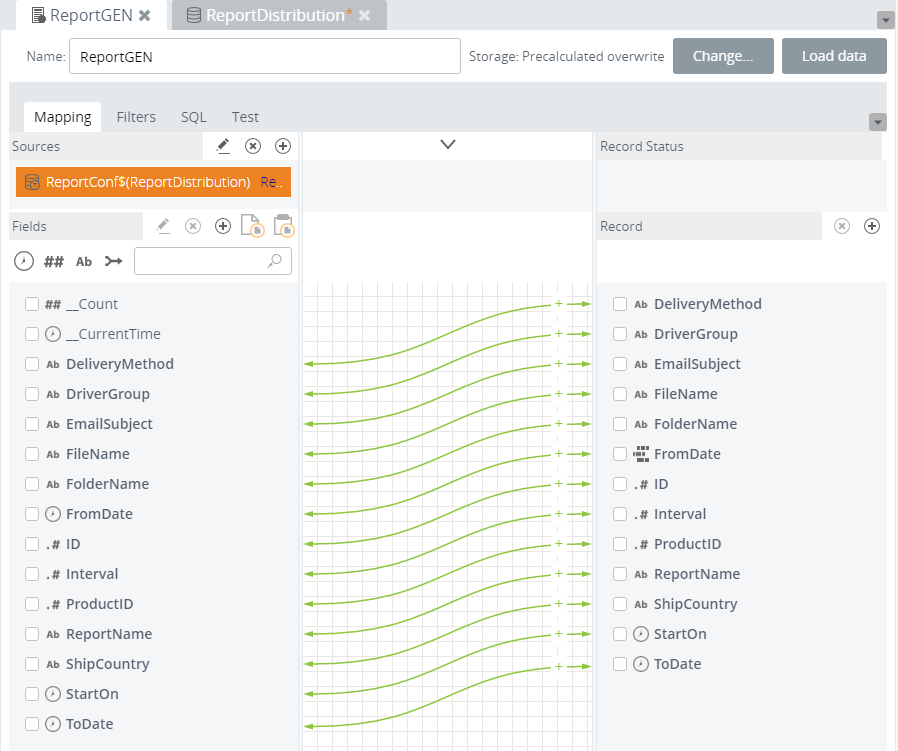
Create a generation record based on the data source created in
Step 2. Select the
Report field and map
all the fields. Fields are the columns from the source Excel table.
-
Save
 the generation record.
-
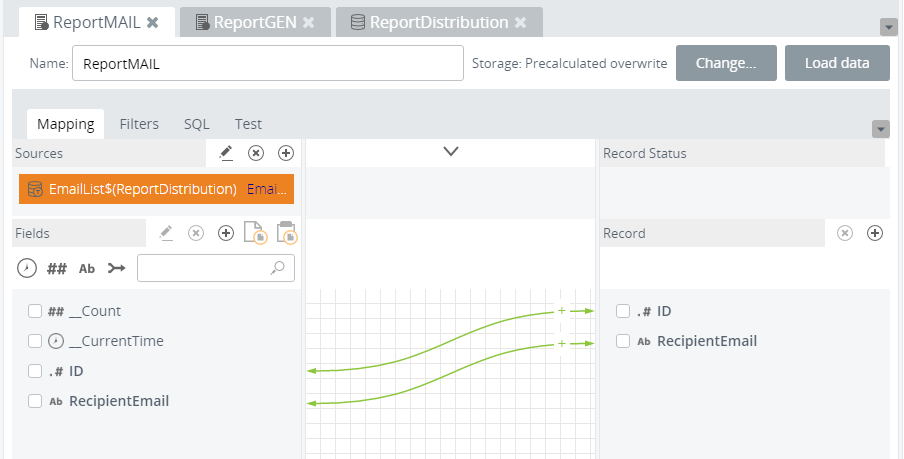
Create an email record based on the data source created in Step
2. Select the
Email tab and map two
fields.
-
Save
the email record.
Create advanced reports
You need to create one advanced report AdvReport1 broken down into three instances.
-
In Studio, on the
Documents Tree,
navigate to
Reports, right-click
and select
New Advanced Report.
Follow the steps as described for an
advanced report. Name the report AdvReport1.
In the Generation pane, select the
generation record created before. In the
Delivery pane, select the
email record created before and specify
email addresses.
Note If the specified email address matches the email address from the Excel file, the report is delivered
-
Save
the report.
- The first instance of AdvReport1 is ready and will be generated and saved to the specified folder (provided in the Excel file, under the FolderName column).
- The second and third instances of AdvReport1 are ready and will be generated and sent to the provided email addresses.