Create a map component
You can create a map component and display the countries, revenues, and pins on US cities where the orders were shipped.
- In Studio, create a new View called Map Revenue.
- Add a map component.
-
Navigate to
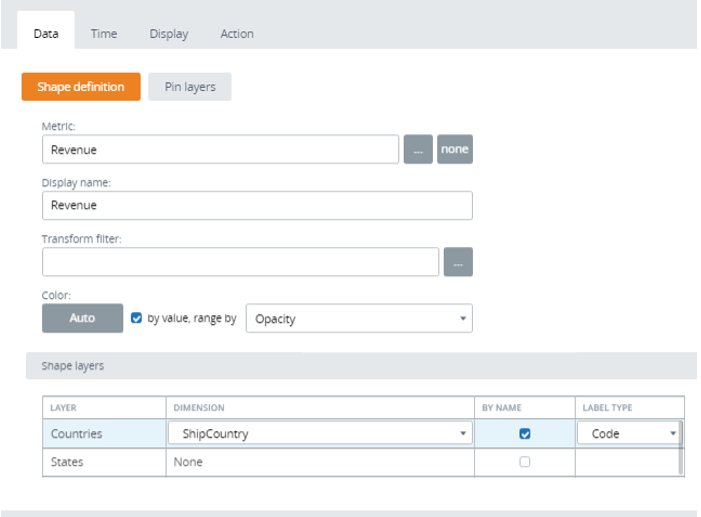
Data Wizard > Shape definition:
- In the Metric field, select the Revenue metric.
- Enter a name in the Display name field, such as Revenue.
-
Select
by value, range by and select
Opacity from the
list.
This option assigns a darker color to higher revenue countries.
- In the Shape layers table, select ShipCountry as the dimension layer for Countries.
-
Select
By name.
If you have defined a Country Code, the country code appears. If not, the Country name appears.
-
Open
.
- Select Add New Data to create a new layer. When prompted for the layer type, select Record layer.
- In the Data wizard, Record field, select Orders.
- In the Display wizard, Drill Downs tab, select ShipPostalCode from the Location list. In this example, use the remaining default settings. Click OK.
-
In the
Display Wizard:
-
Select
Countries as layers.
This option displays all the countries.
- Select OrderDate as a pin layer.
-
Select
Countries as layers.
- Click OK.
-
Save
 the changes.
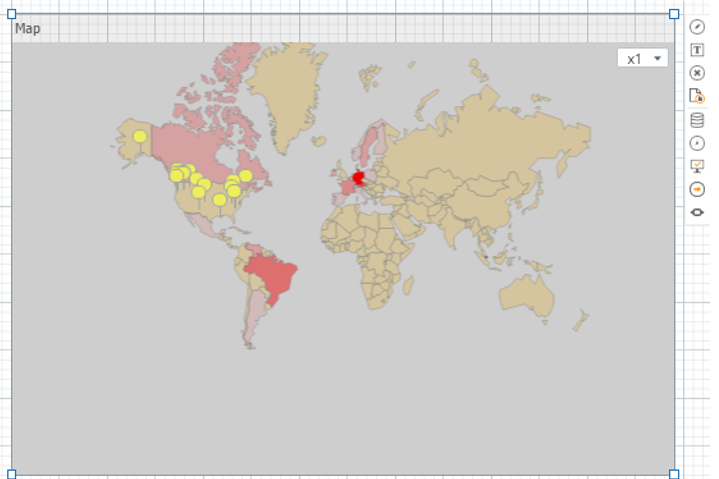
- Open the View in the Preview/Viewer. Zoom in to see US cities and pins.