Web service calls
You can assign the Web service call action for an actionable component to transfer the data to other applications with the help of web-service technologies. You can use different methods, such as, text, XML, HTML, or JSON.
For the JSON data type and POST request type, you can also configure the success of failure message that appears after the web service call is performed. Success messages are sent for the HTTP response = 200 (OK) and failure messages are sent for the HTTP response = 500 (server error).
Note that if you include the web service call action into multiple actions, and the web call returns a failure response for an error, the following action is not executed. This behavior applies for synchronous actions.
- To set up a web service call, open the Actions wizard for an actionable component and select Web service call as an action.
-
On the
General tab, select the
record and the group. Fields from this record will be sent via the web service
call.
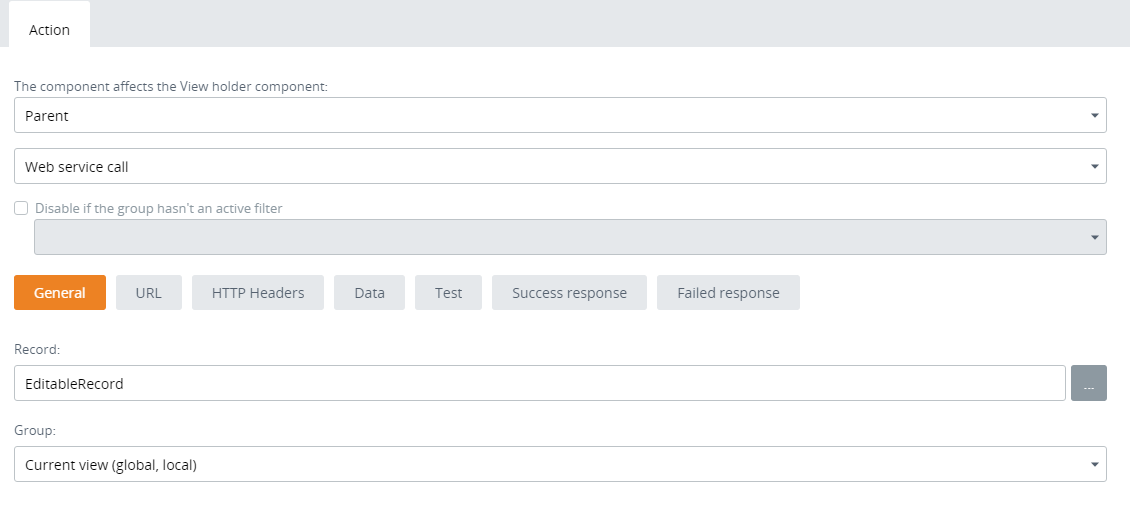
- Use the URL tab to select the web service document as a template for the web service call. See Remote services for more information about creating these templates.
- Use the HTTP Headers tab to create custom HTTP headers and select which value to use.
-
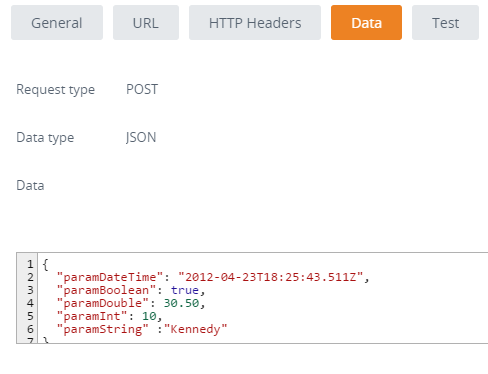
The
Data tab shows the format
used for sending data. Use the
Define parameter types
link to define field types for the selected record. Use
Add field to data to
insert record field templates. For example, you can also add user properties
and parameters. If you have any selection on the parameter filter, the
actionable component sends this parameter value to the web service request. The
same applies to the time selection on the parameter driver.
-
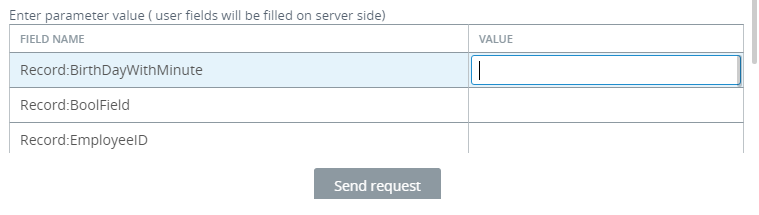
Use the
Test tab to test the web
service call with some values. Click the
Test button, provide
sample test values in the Value column, and click
Send request.
-
Use the
Success response and
Failed response tabs to
create templates for the success and failure messages that are shown after the
web service call is complete. Use the editable box to modify the response. You
can add any fields or type any text as a JSON object, and then click
Insert.

- Click OK.