Edit styles in Studio
If the administrator assigned your role with special permissions, you can modify styles for different components and their parts directly on the View: text, borders, and color palettes. Such permissions are granted in the Admin Console application. See the Kofax Insight Admin Console Help.
- In Studio, open the View and create the required component.
-
Highlight the component and in the
Property Panel
find the style property to edit. You may type
"style" to search for all style properties available. Click the
ellipsis button.
For example, select the Border style.The Select style window appears with all styles of the selected type (all border styles in our example) with the selected style being highlighted and in focus.
-
Click the pencil icon to edit any existing style or click the
"Add New Border Style" link at the bottom.
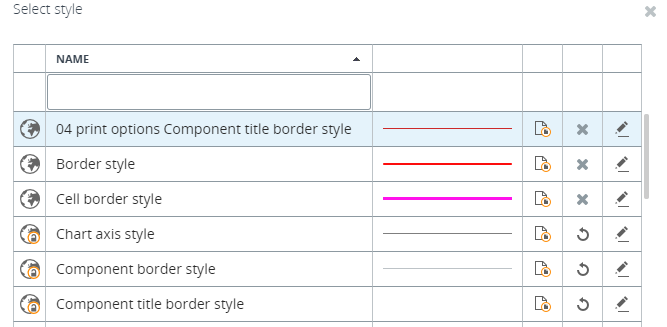
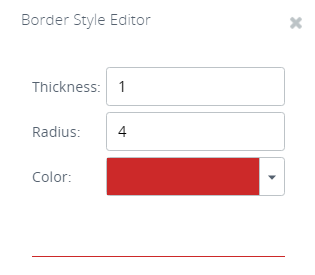
The "Border Style Editor" window appears. -
You can edit the style selected initially, edit any other style,
or create a new style. For example, for a border you can edit thickness,
radius, and color. Click
OK to apply the changes
to the style.
-
Highlight the style to use on the View and click
Select to apply the
changes.
The component is refreshed and the style applies automatically.