Edit a classification group
You can edit an existing classification group to add a new document type and train your documents.
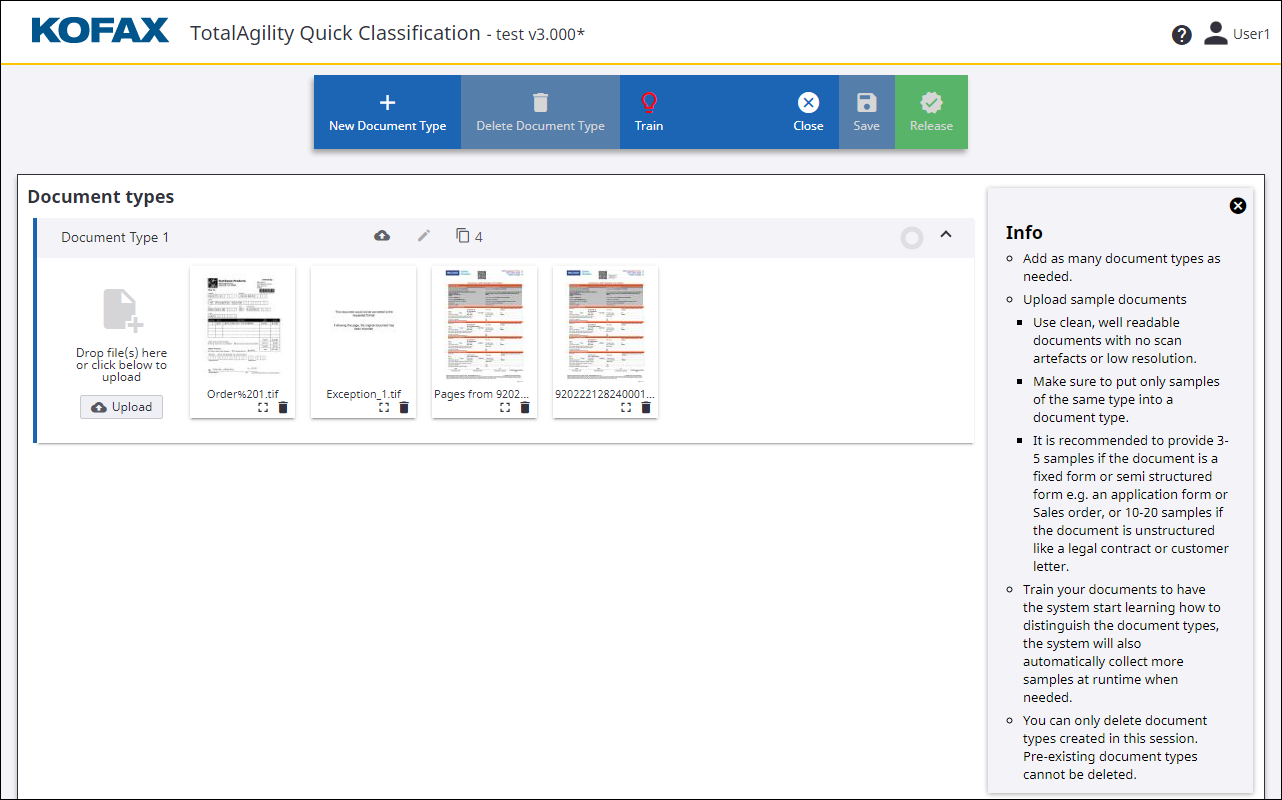
On the Classification groups list, click the classification group or on the context menu of the classification group, clink Edit. All the existing document types for the selected classification group are displayed.
A pop-up is displayed with the following warning:
Saving changes to this classification group will remove the association with the Capture Solution. Other artifacts from the Capture Solution are not affected. Are you sure you want to continue?
When you save a selected classification group, it will remove the association with the Capture Solution.
Select Yes to continue.
A document type page appears with the list of all the existing document types.

Click the following links to learn more about how to edit a classification group in Quick Classification.
Add a document type
Add as many document types as needed.
Upload sample documents that are clean, well readable with best possible image quality.
Make sure to only add samples of the same type into a document type.
We recommend that you provide 3-5 samples if the document is a fixed form or a semi-structured form such as an Application form or a Sales order, OR 10-20 samples if the document is unstructured such as a Legal contract or Customer letter.
You can update an existing document type or create a new document type and upload documents.
Add documents to an existing document type
Drop files from your machine to this document type. As another option, click Upload and browse the documents you want to upload.

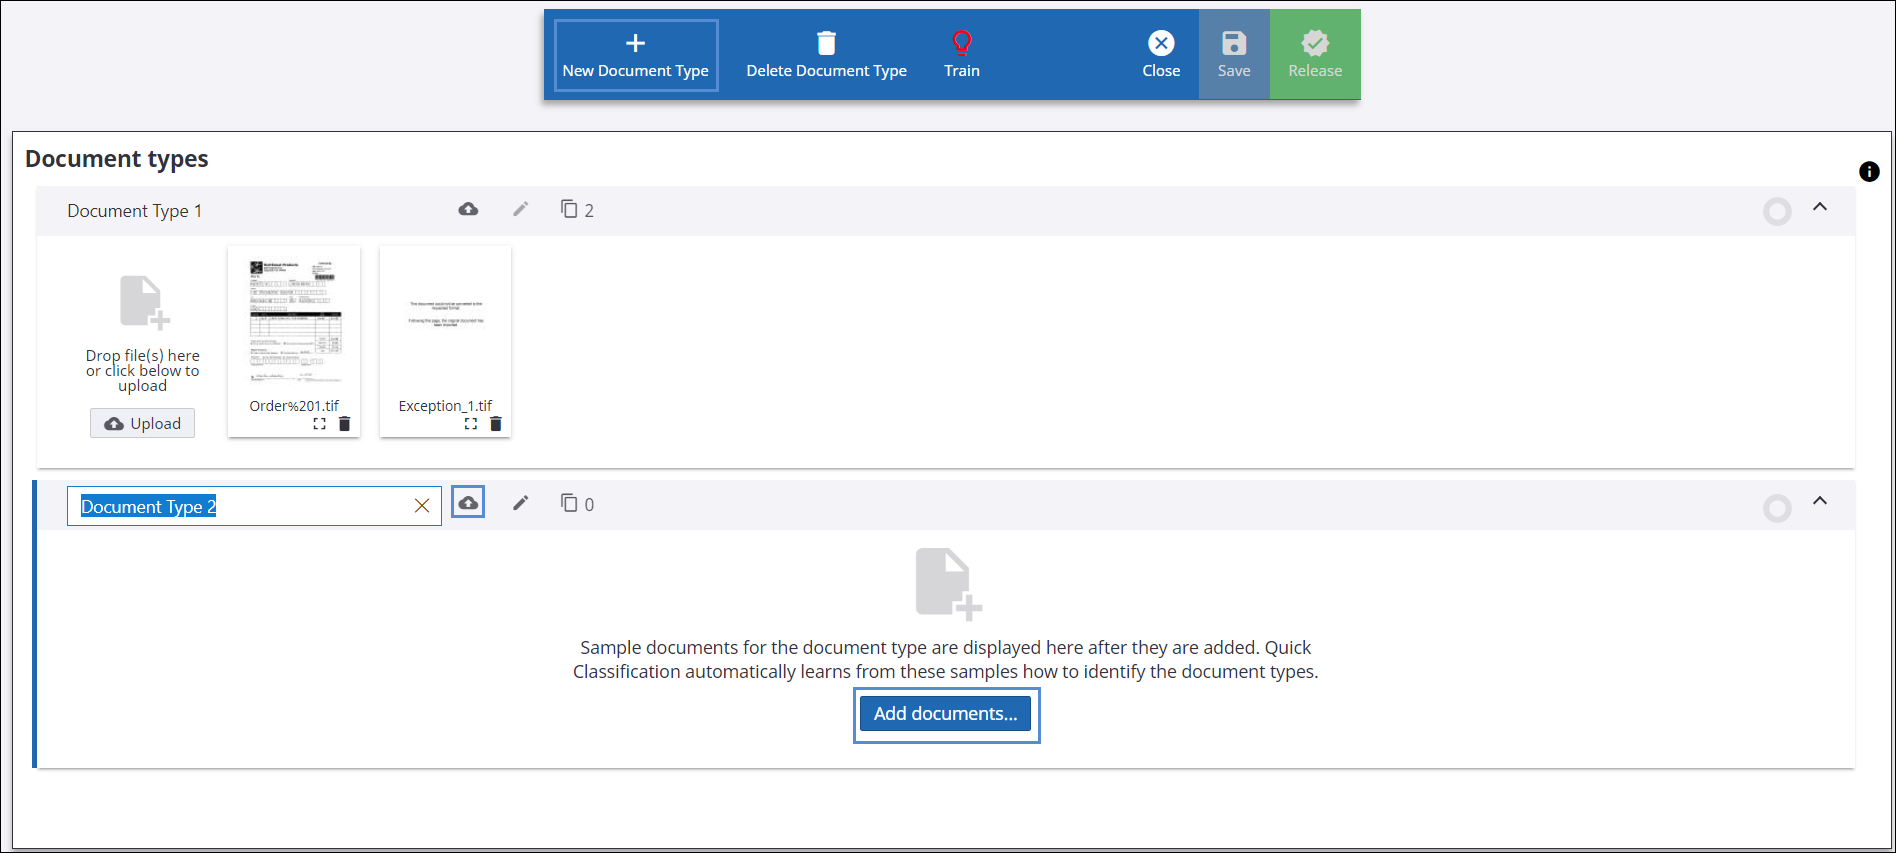
Create a new document type
Create a new document type and then upload files to it.
-
Click
New Document Type on the ribbon menu.

- Specify a name for the new document type.
-
Click
Add documents or click
and browse the documents you want to upload.
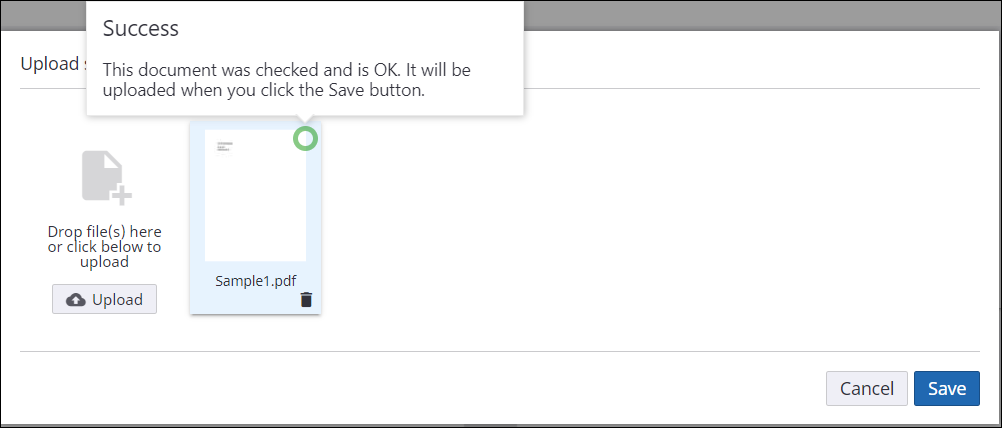
The system checks the document and if finds it OK uploads it to the document type when you click Save. The Green circle indicates that the document is OK.

Manage a document type
You can edit the document type name, delete an uploaded document, open a document in Full screen or delete a document type created in this session.
The number of documents available for a document type is displayed on the document type header.

-
To edit a document type name, click the document type name to edit or click on the document type header, and make changes.
-
To delete an uploaded document, for example, to delete Sample5.pdf, click delete for the document. Once you delete a document, the number of uploaded document is automatically updated on the document type header.
-
To open a document in full screen, for example to open Sample4.pdf in full screen, click for the document.
-
To delete a document type, click in the document type panel and click Delete Document Type on the Ribbon menu.
Note You cannot delete any pre-existing document types.
Train your documents
Train your documents to allow the system to learn how to distinguish the document types and automatically collect more samples at runtime when needed.
On the Ribbon menu, click Train. The quality of classification results is indicated by Green, Amber and Red circles.


Save and release the classification group
On the Ribbon menu, click Save to save your classification group or click Release to release the classification group.