Robots
This subsection helps you manage the robots in the repository on a per project basis. In order for robots to be able to run in a schedule, they have to be uploaded to the repository. When the robot is uploaded, it is copied into the repository. Thus, if changes are later made to the robot in Design Studio, it needs to be uploaded again (this can easily be done from within Design Studio). Doing so will not remove the robot from schedules with which it is already associated. Rather, these schedules will use the new version of the robot the next time they run.
Each robot belongs to a project. At the top of the Robots tab, you can select the project for which robots are shown.
Within a given project, you cannot have two different robots with the same name in the repository. They will be considered the same robot, and the one you upload last will overwrite the previous one. Different projects can contain robots with the same name.
The robots are displayed in a table, with a default of 40 robots per page. The information is structured in columns as follows.
|
Column |
Description |
|---|---|
|
Name |
The name of the robot. If the robot uses a type or a snippet which is not present in the repository, the name will be marked in red. |
|
Folder |
The name of the folder specified to store the robot files. By default, the files are stored in the Root folder. You can create a new folder to store the files. The folder name is displayed in the column if the selected folder is other than Root. Folders are also shown as part of the robot name in the Robot Runs view on the Logs tab. When deleting a robot, you can delete an empty folder. |
|
Project Name |
The name of the project that the robot belongs to (useful when viewing all projects). |
|
Version |
The Kofax Kapow version last used when editing the robot. |
|
Size |
The size of the robot in bytes. |
|
Schedules |
The names of the schedules that will run the robot. |
|
Delete |
Click to delete the robot from the repository. The robot is automatically removed from any schedules used to run it. If you don't have a copy of the robot in the file system, it is irrevocably lost. |
|
Input Types |
Types used in input variables in the robot. To execute the robot, .type files corresponding to each of these types must be present |
|
Returned Types |
Types of values returned by the robot. When executing the robot via the API, it may return values of these types. To execute the robot, .type files corresponding to each of these types must be present. |
|
Stored Types |
Types of values stored in a database by the robot. To execute the robot, .type files corresponding to each of these types must be present. |
|
Snippets used |
Names of the snippets used by this robot. If a robot uses snippet A and snippet A uses snippet B, only snippet A will be listed here. |
|
Mappings |
Shows robot's user and label mappings. |
|
Created By (hidden by default) |
The user name of the user who first uploaded the robot. This feature is only available when running a stand-alone Management Console. |
|
Modified By (hidden by default) |
The user name of the user who last modified the robot. This feature is only available when running a stand-alone Kofax Kapow. |
|
Last Modified |
The date of the most recent modification of the robot. |
|
Run Now |
Click this button to start immediate execution of the robot on RoboServer. This feature is not available for robots that take input. |
|
API |
Click this button to see an example Java or C# code for executing the robot on RoboServer. |
|
REST |
This will open a window that allows you to invoke the robot as a REST service. |
|
SOAP |
This will open a window that allows you to invoke the robot via SOAP. |
|
Download |
Click to download a copy of the robot from the repository and save it to the file system. |
Right-clicking a robot opens the following menu:
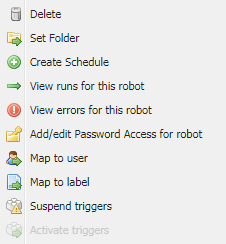
The Delete, Set Folder, and Create Schedule options are available when multiple robots are selected. If you have multiple robots selected and create a schedule, the New Schedule dialog box will open with all the selected robots added. If any robot added this way requires input, you will have to add it later.
Map to user, Suspend triggers, and Activate triggers are available for robots with triggers in the Device Automation workflow.
Clicking "Add Robot" in the upper left corner opens a window for uploading a new robot. If you upload a robot with the same name as an existing one, the existing one will be replaced, with no changes to schedules that run it. If you upload a new robot, it is not added to a schedule automatically; you will need to do this yourself.
An alternative way of uploading a robot is to use one of the Upload functions in Design Studio. This works in exactly the same way, except that Design Studio also uploads the necessary types and snippets. If your Management Console Repository contains multiple projects, you will be prompted to choose which project to upload the robot into.