Configure Automation Device
This chapter describes Device Automation Service configuration.
Device Automation Prerequisites
All Device Automation requirements and prerequisites are listed in the System Requirements chapter of the Installation Guide.
Configure the Automation Device Agent
Once your computers meet all the necessary requirements for device automation, you can install and configure the Automation Device Agent.
- If you need to automate Java applications, install Java 32-bit (JRE or JDK) on remote devices and check that the Java Access Bridge is enabled on your devices.
- Download and run the Kapow Device Automation installer on your device.
- Start the Device Automation Service from the Start menu. Once the service
starts, you can see its status by looking at the icon in the notification area.
Icon
Status

Device Automation Service is starting and trying to connect to the configured Management Console.

Device Automation Service is running and either connected to a Management Console or running in single user mode depending on configuration.

Device Automation Service is running and in use by RoboServer or Design Studio.

Device Automation Service is not running.

Device Automation Service is not running due to an error.
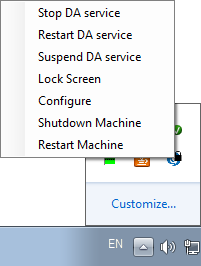
- To edit the Device Automation Service options, right-click the Device
Automation Service icon in the notification area and select
Configure. This opens the Device Automation Service window. After changing
the options, click
Save and Restart.
To manually edit the options, open the server.conf file on your Automation Device. The file is located in Users > UserName > AppData > Local > Kapow 10.3.0 directory where UserName is the name of the user the service is running under.
See the table with Device Automation Service options below. -
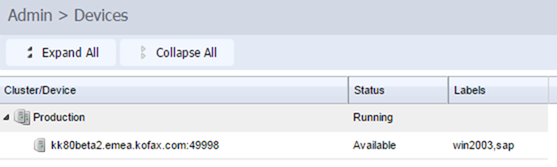
Check that the device is registered in the Management Console under tab.
The following is a Device Automation Service configuration window.
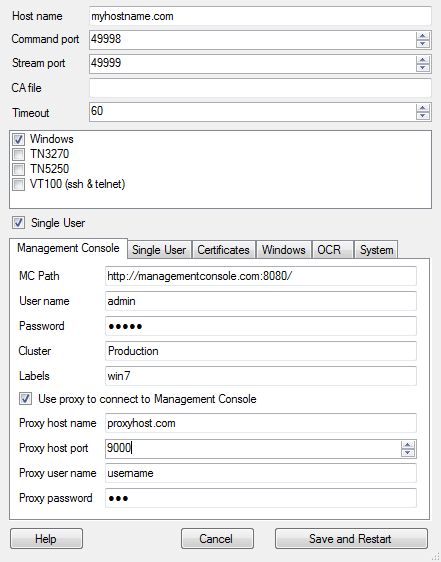
The following table lists the available Device Automation Service options.
|
Configuration Window Option |
server.conf Option |
Value and Description |
|---|---|---|
|
Single User Clear (default) Select for direct connection to the Automation Device from Design Studio or when using the RDP connection. |
"singleUser" |
false (default) true Set to false to automatically register the Device Automation Service with the specified Management Console. For direct connection to the Automation Device, set to true and specify a token.* |
|
Host name |
"hostName" |
Name or IP address of the computer running the Device Automation Service. If a computer has multiple names or IP addresses, specify the one that RoboServers and Design Studio contact this Automation Device Agent with. That is, the host name or IP address must be reachable from RoboServers and Design Studio. |
|
Command port |
"commandPort" |
49998 (default) Reassign this port for the Automation Device if necessary. |
|
Stream port |
"streamPort" |
49999 (default) This port is used to send data between Design Studio and Device Automation Service. If streamPort is set to "0", the Device Automation Service selects a random port number. You might need to reassign the streamPort if there is a firewall between Design Studio and the Automation Device. |
|
CA file |
"caFile" |
empty (default) You can communicate with the Management Console using SSL. If the default certificate in node.js is not used, you can specify a path to another certificate file using this parameter. |
|
Timeout |
"commandTimeout" |
This option specifies the timeout for command execution in seconds. A command is an instruction sent to Automation Device, such as click mouse button, open application, add a location found guard, and so forth. If a command cannot be completed in a specified time, the service sends a notification and execution of the robot stops. Note that in case of a Location Found guard, this setting applies to invoking the guard in the workflow, but waiting for the guard to be satisfied is not bound to this timeout and can wait forever. Similar situation occurs when using the Move Mouse and Extract steps. The commands must be invoked on the device withing the timeout specified in this field, but the robot waits for up to 240 seconds for the commands to complete. The command timeout for automating terminals or browsing websites in Device Automation Workflow is set either on the Device Automation tab of the Design Studio Settings window for executing the workflow in Design Studio, or in the Device Automation section on the Security tab of the RoboServer Settings window for roboserver execution. |
|
Token on Single User tab |
"token" |
empty (default) If the "singleUser" option is set to false, leave this option empty. If you use the direct connection to the Automation Device ("singleUser": true), specify a token. It can be any token you define. |
|
List of drivers to load at startup, such as Windows, TN3270, TN5250, VT100 Windows (default) |
"drivers" |
["automationnative"] (default) You can select drivers to load at startup. Windows is the default driver for automating native Windows and Java applications. Leave this parameter as is. To access a terminal from the Automation Device, select the corresponding driver. |
|
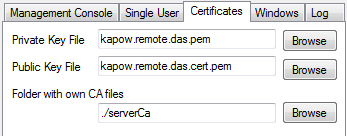
Certificates tab
|
"tlsServerConfig" |
Kapow provides TLS communication between Automation Device and RoboServer or Design Studio. The communication uses certificates for encrypting the communication. The following is a cerver.conf file code extract. For more information see Use TLS Communication. |
|
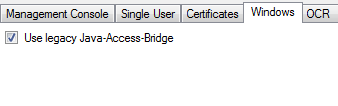
Windows tab |
"automationnative" |
"useLegacy": In some situations the Java Access Bridge does not work and it can help to switch to legacy mode. Default is false. |
|
Log tab This tab helps you open the log file to examine for any errors and shows the version and location of the service file. |
||
|
OCR tab |
"ocrConfig" |
"defaultLanguage": "eng" Specifies a language to perform an OCR operation. By default, Kapow installs the English language. See Change Default OCR Language for language installation instructions. |
| Management Console Options | ||
|
MC Path Connection protocol, name or IP address, port number, and path of the Management Console the device must register with. The format is as follows: http://10.10.0.136:50080. |
"hostName" |
Name or IP address of the Management Console the device must register with. |
|
"port" |
Connection port of the specified Management Console. |
|
|
"schema" |
Connection protocol of the specified Management Console. |
|
|
"path" |
empty (default) The part of the path to the standalone Management Console after the port number. For example, if your Management Console is deployed on Tomcat at http://computer.domain.com:8080/ManagementConsole/, specify "/ManagementConsole/" in this parameter. Leave this parameter empty for the embedded Management Console installation. |
|
|
User name |
"user" |
empty (default) User name to authenticate on the specified Management Console. |
|
Password |
"password" |
empty (default) Password to authenticate on the specified Management Console. |
|
|
"pingInterval" |
5000 (default) Time interval for the Device Automation Service to ping the Management Console. |
|
Cluster |
"cluster" |
Production (default) Cluster name on the specified Management Console. |
|
Labels |
"labels" |
"label1,label2" (default) Labels to distinguish the Automation Devices. |
|
Use proxy to connect to Management Console |
"useProxy" |
Select this option for the Device Automation Service to use proxy when connecting to Management Console. All necessary parameters are specified in the following fields. 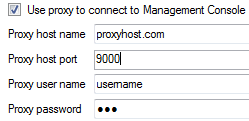 Under Linux, you can set up proxy parameters in the managementConsole section of the server.conf file. |
* The direct connection to the Automation Device is recommended for creating and debugging a robot in Design Studio as well as for using with RDP connection.
Change Default OCR Language
Kapow uses the Tesseract OCR engine to capture text from images. By default, Kapow installs the English language for OCR. When your robot performs text recognition in the Extract Text From Image Step, Kapow uses the language selected on the OCR tab of the Device Automation Service window. To change the default language for OCR, perform the following steps.
- Download the .traineddata file for the required language from the https://github.com/tesseract-ocr/tessdata. For example, the file for the French language is fra.traineddata.
- Copy downloaded trained data file to
DeviceAutomationService\lib\tessdata in the Device Automation service installation directory.
Example:
C:\Program Files (x86)\Kapow DeviceAutomation 10.1.0 x32\DeviceAutomationService\lib\tessdata
- Right-click the Device Automation icon in the notification area and select Configure.
- Click the
OCR tab and select a language in the
Default OCR language list.
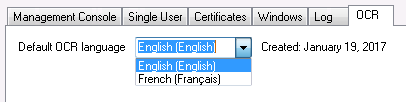
Click Save and Restart.