Built-in Excel
The Desktop Automation workflow includes built-in Excel that helps you perform some operations on Excel spreadsheets.
To create a new Excel spreadsheet, insert the Open Step, and in the URI field, type the following: excel://new.
To open an existing Excel spreadsheet, after excel://, type the full path to the spreadsheet. For example, excel://c:/documents/myspreadsheet.xlsx.
Note that Kofax RPA can create a spreadsheet with only one worksheet. When you open a spreadsheet with several worksheets, you can navigate between them by clicking a button for the respective worksheet.
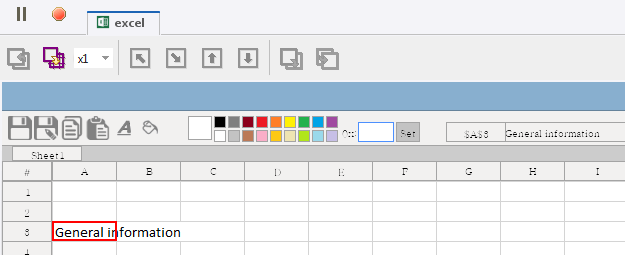
Use toolbar buttons in the built-in Excel to perform the following operations.
|
Button |
Description |
|---|---|
|
|
Save: Saves the changes in the spreadsheet. |
|
|
Save As: Opens the Save As dialog box to save the current spreadsheet under a different name. |
|
|
Copy: Copies current selection to the clipboard. For selection options see "Select cells" subsection below this table. |
|
|
Paste: Inserts clipboard contents to the selected cells. |
|
|
Set text color: Applies active color to the selected text. |
|
|
Set background color: Applies active color to selected cells. |
|
|
Color Picker: Sets an active color to use for color changing actions. |
|
|
Custom color input: Specifies custom color for the Color Picker in hexadecimal (hex) format. For example, pure white is ffffff, pure black is 000000. |
|
|
This text field shows the address of the currently selected cell and its value. |


- Select cells
- You can select one or more cells in the worksheet as follows.
- To select one cell in the worksheet, click it just as you would do in a desktop version of Microsoft Excel.
- To select a row, click the row heading.
- To select a column, click the column heading.
- To select the entire worksheet, click Select All
 .
.
- To select a range of cells in a worksheet, use arrows with Shift in the
Press Key Step.
Note that selection is made from left to right and from top to bottom. You cannot select cells by moving your selection up and from
right to left.
For example, to select a range that is five cells wide and three cells in height, do the following.
- Click a cell located at the top left corner of your range.
- Insert the Press Key step. In the step, specify excel as the application name in the finder, select the Right Arrow in the Standard Keys, select Shift as the key modifier, and enter 4 in the Count field.
- Execute the step.
- Insert the Press Key step. In the step, specify excel as the application name in the finder, select the Down Arrow in the Standard Keys, select Shift as the key modifier, and enter 2 in the Count field.
- Execute the step.
As a result, you should see the selected range of cells in your worksheet.
- Change color
- To use color changing actions, first either select a color in the Color Picker or specify a custom color in the Custom color input. To specify a custom color, click the text area in the Custom color input, enter the required color in hex format, and click Set. Once the active color is set, use "Set text color" or "Set background color" actions.