Add a Single Robot
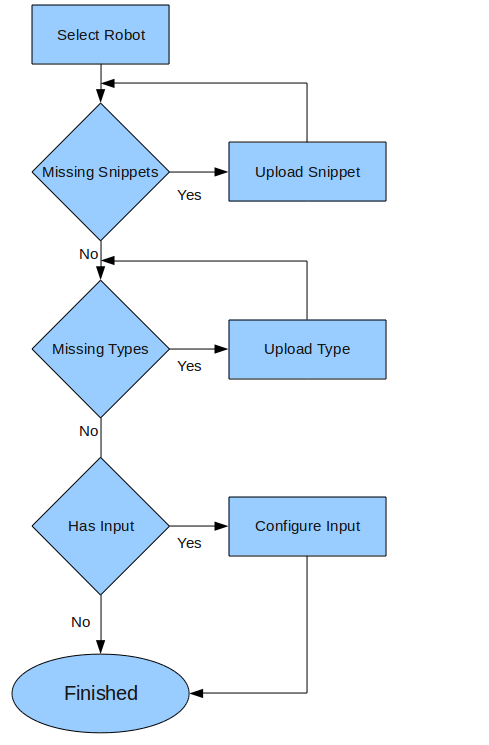
The wizard for adding a single robot contains one to four steps, depending on the robot you select. The wizard follows the flow outlined in this topic. The four rectangles correspond to the four possible steps.

- Select a robot in the Robot list of the Select Robot step.
-
If all snippets and types used by the robot are already uploaded, and the robot does not have any input variables, you
can click
Finish; otherwise click
Next.
If the selected robot uses any snippets that have not been uploaded to the Management Console repository, you must upload them now.
-
In the
Upload missing snippets window, browse to the missing snippet and click
Upload. You can also specify a folder in the
Select folder list.
If the selected robot uses any types which have not been uploaded to the Management Console repository, you must upload them now.
-
In the
Upload missing types window, browse to the missing type and click
Upload. You can also specify a folder in the
Select folder list.
The configure input for your robot window appears.
- Configure the robot input used when it runs as part of this schedule.
-
If an attribute is of a binary type, you can use the drop down list to select a resource that is already uploaded, or
click
Upload to upload one.
If an attribute is required, it is underlined with red.
- Complete all required fields and click Finish.
