Custom Defined Fields serve for adding additional information to PDF documents so you can later find them more quickly with an index search.
Custom defined fields let you narrow the search, using not only the standard fields (author, title, subject, keywords) but also custom defined fields containing values you can specify. Narrowing the search means that the program will make a full-text search for a given phrase only in the documents distinguished with (one or more) custom defined fields.
You can add as many custom defined fields as you need to your PDF file.
Use the Document Settings dialog box in Kofax PDF Create or the Document Properties dialog box in Kofax Power PDF.
As an example, to search PDF files containing data on the last quarter of 2008, define a field: ‘Quarter’, and enter ‘2008 Q2’. Do this for all PDF files you want included in this category.
To add a custom defined field to a PDF document in PDF Create
Click Profiles in Create Assistant, select the checkmark Document Settings and click Edit.
In the Document Settings dialog box click the Document Information tab.
Under Custom, enter a field name in the Name box. For example, enter Quarter.
Enter a field value in the Value box. For example, enter 2008 Q2.
Click Add.
The newly created custom defined field appears together with its value at the bottom of the dialog box in a table-like structure.
Click OK.
To delete a custom defined field
In the table, select a row to be deleted.
Click the Delete button.
To change a custom defined field
In the table, select the row where you want to change the value of a custom defined field.
In the Value box, change the field value.
Click the Change button. The table row displays the new value.
To add a custom defined field to a PDF document in Power PDF
Display the Document Properties dialog box from the File menu by choosing Properties and then clicking Edit Properties.
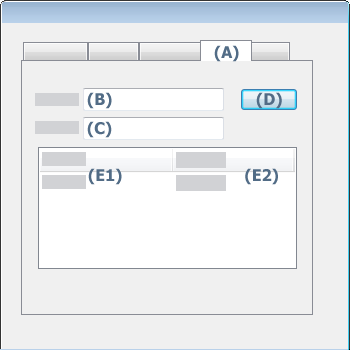
Click the Custom tab (A).
Enter a field name in the Name box (B).
Enter a field value in the Text box (C).
Click Add. It becomes Change (D).
The newly created custom defined field appears under Property Name (E1) and Property Value (E2).
Click OK.