Overlaying Files
The contents of two or more files can be overlaid.
Overlaying files is only possible if you have more than one file in the file list of Create Assistant, or selected in Windows Explorer.
To start an overlay
-
Prepare the files to be overlaid. See the examples below.
-

Go to the Assemble selection box in Create Assistant and select Overlay files as one PDF document, or
Select Overlay files as one PDF in the shortcut menu in Windows Explorer, or
Select Overlay with existing file in the If File Exists selection box on the PDF Settings panel of the Kofax PDF Create Properties dialog box.
To change the overlay options
Display
-
the Overlay Options panel from Create Assistant by choosing to overlay files in the Assemble selection box or
-
the Overlay dialog box when you choose to overlay files as a saving option when a naming conflict occurs.
and make your changes.
Example 1
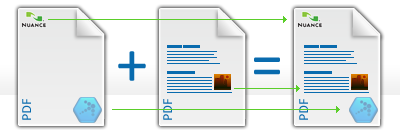
Here you can see an example for a cover page:
|
Single page with picture elements
|
+
|
First page of a multi-page document
|
=
|
Cover page of resulting PDF file
|
To do an overlay for a cover page
-
Create a single-page PDF, Word or other file containing the picture elements for the cover.
-
Create a multi-page document (e.g. in Word). Its first page should contain the cover page text.
-
Drag-and-drop the files to the file list in PDF Create Assistant or use the Add button.
-
Select Overlay files as one PDF document in the Assemble selection box.
-
Click the Overlay button and check the overlay settings in the Overlay panel. Page Center should be selected and the checkbox Repeat the last page of the shortest document for page overlay should be de-selected. Click anywhere outside the panel to close it.
-
Click the Saving button to define the destination settings. By default, the Save As dialog box will appear. Name your resulting PDF file.

Click the Go button to start conversion.
You can get the same result by overlaying three files, if you have the two picture elements in two separate files. The picture elements should be placed in the source file in the position where they should appear in the resulting PDF.
Example 2
To put a logo on every page of a document
-
Create an image or other file containing a logo.
-
Create a multi-page document.
-
Drag-and-drop the files to the file list in Create Assistant or use the Add button.
-
Select Overlay files as one PDF document in the Assemble selection box.
-
Click the Overlay button and check the overlay settings in the Overlay Options panel. Select a placement location (e.g. Right-Top Corner).

-
Select the checkbox Repeat the last page of the shortest document for page overlay.
All pages get the logo in their right-top corner.
Example 3
How to have one or more cover overlays, and then a different overlay for all other pages.
Pre-existing file:
Newly created document:
Multi-page document. Page 1 from each file will be overlaid, each page 2 will be overlaid, each page 3 and so on. The contents of the last page in the pre-existing file will be placed on all remaining pages in the resulting PDF.
To get this result through Create Assistant
-
Prepare the file with the pre-existing elements.
-
Prepare the main document that should receive these elements.
-
Drag both documents into Create Assistant.
-
Select Overlay files as one PDF document.
-
Click the Overlay button to make Overlay settings.
-
Be sure that profile and saving settings are in order.
Click the Go button.
To get this result from a Print dialog box
-
Prepare a pre-existing file with the constant cover elements on its first pages and with the constant elements for all pages (e.g. a logo) on its last page.
-
Copy this file to the name and location to be used for the overlay result, converting it to a PDF if it is not already in that format.
-
Create a multi-page document in Word or elsewhere. The first pages of this document should contain cover page texts suitably arranged to accept the cover overlays.
-
In the application, select File > Print.
-
In the Print dialog box, select Kofax PDF Create as a printer name and click the Properties button.
-
In the Kofax PDF Create Properties dialog box, click the PDF Settings tab.
-
In the Destination section, select Overlay with existing file in the If File Exists selection box. Check that Query the file name is selected in the Naming Method selection box.
-
Click the Overlay button.
-
In the Overlay dialog box, check the merge rules (page center). Select Repeat last page of the shorter document for page overlay. Click OK.
-
In the Kofax PDF Create Properties dialog box, click OK.
-
In the Print dialog box, click OK.
-
In the Save As dialog box, select the file name of the pre-existing PDF file. Check that View Resulting PDF is selected. Click Save.
PDF creation will start and the resulting PDF will be displayed.