Add a blank-out region
If a zone contains information that is irrelevant, such as a logo, image, or extraneous label, you can remove it from the zone by creating a blank-out region within your zone. Before the zone is extracted, the blank-out region content is blanked out and hidden during extraction so it does not affect the results. The need for these regions is most commonly used for situations where field labels and values use the same space.
See the example that follows the procedure for a detailed and graphical explanation of blank-out regions.
You can add a blank-out region to a zone by following these steps:
- Open the locator properties.
- Click the Zones tab.
-
Add or
open the reference document.
The reference document for that locator is displayed in the Document Viewer (Zone Mode).
-
Add a new zone or double-click an existing zone to blank out a portion of the zone.
The Zone Properties window is displayed for the selected zone.
-
Inside the image snippet, draw a border around the area to be blanked out.
A resizable yellow box is added around the blank out area.
-
Click
Test to ensure the zone results are as expected.
If the results are not as expected, modify the settings until they return a confident result.
- Click Close to save your settings and close the Zone Properties window.
- Click Test to see the results of your configured zones and associated subfields.
- Optionally, click Close to save your settings and close the locator properties window.
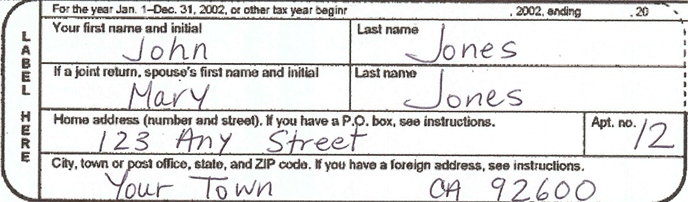
For example, the following form has fields where the label and the value are close together. This particular form can be filled out online in a PDF and printed and filled in by hand. As a result, in order to guarantee that both typed and hand written values are accounted for, you also need to include the label itself in the zone.
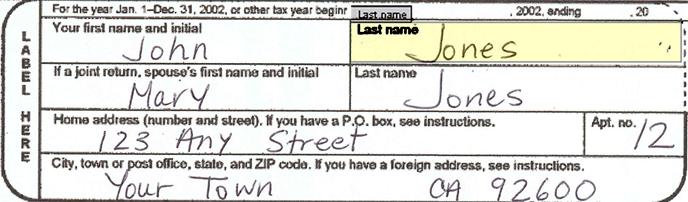
This image shows how the zone includes the "Last name" field because the handwritten name overlaps the space where the label resides.
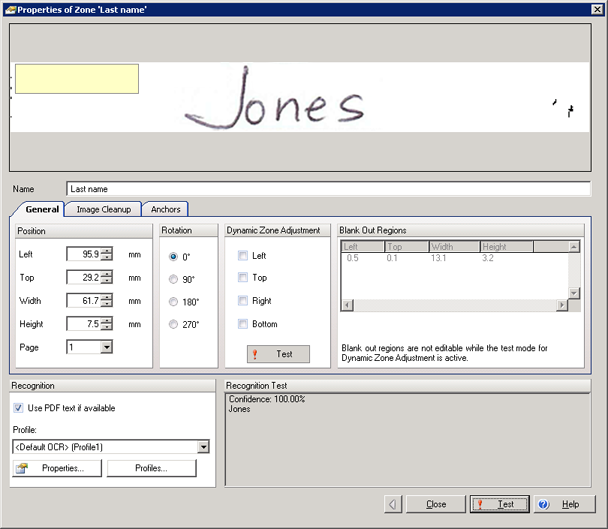
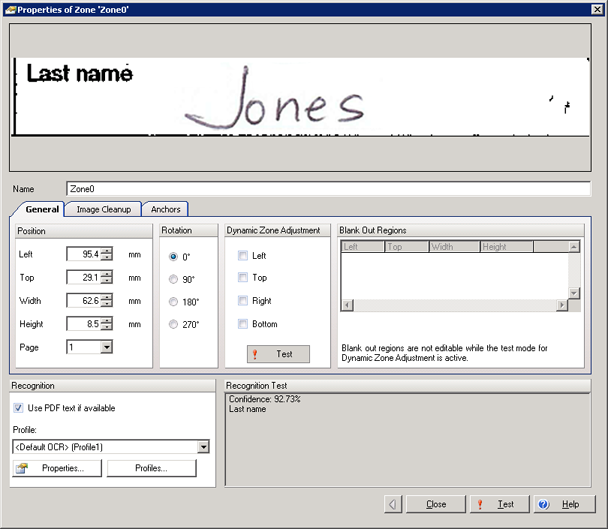
The following image shows the zone properties for the Last name field, and shows the test results when the label is not blanked out. As you can see in the Recognition Test group, the results are high, but maybe you would like higher confidence results. You can improve these results by blanking out the part of the file that contains unwanted content.
This final image shows what happens when the label is blanked out. The results are much better than before.