Remove repeating patterns
The following image shows an example of a prescription document that contains some repeating patterns and graphics.
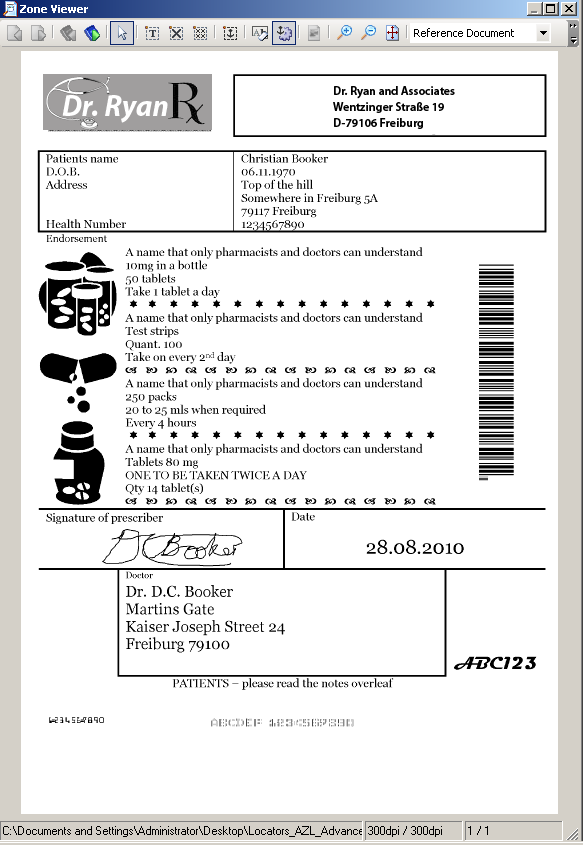
When recognition is performed for this document, it returns the following result:
A name that only pharmacists and doctors can understand
lomg in a bottle
50 tablets
Take 1 tablet a day
***************
A name that only pharmacists and doctors can understand
Test strips
Quant. 100
Take on every 2"d day
es B
B) 02
es B
B) 02
es B
B) 02
es B
B) 02
A name that only pharmacists and doctors can understand
250 packs
20 to 25 mls when required
Every 4 hours
***************
A name that only pharmacists and doctors can understand
Tal)lets 80 mg
ONE TO BE TAKEN TW[CE A DAY
Qty 14 tablet(s)
es B
B) 02
es B
B) 02
es B
B) 02
es B
B) 02
These results are not very good because the repeating patterns and images are interfering with the recognition results.
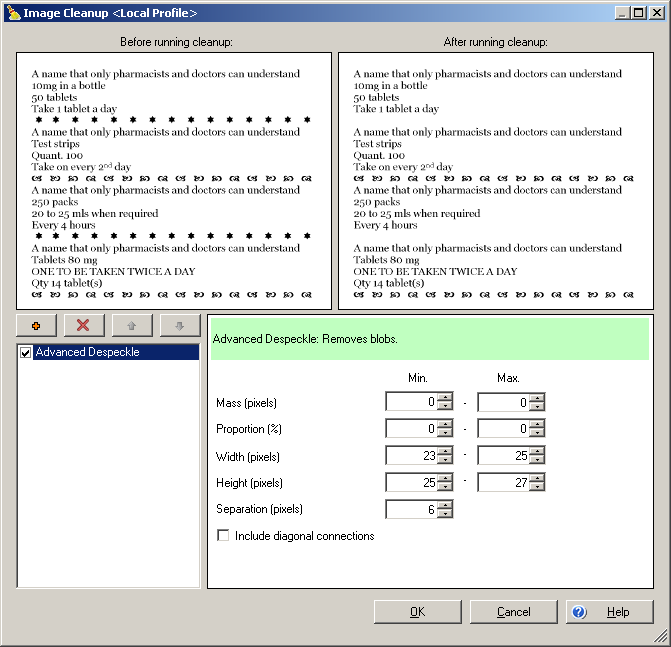
The following example to show how repeating patterns can be removed from an image using two layered Advanced Despeckle image cleanup methods. One for the repeating stars and another for the repeating gif images.
You can improve extraction results for documents that contain repeating patterns or unwanted graphics by following these steps:.
- Add and Advanced Zone Locator for the class the processes documents with the unwanted blobs.
- Add a reference document to the Advanced Zone Locator.
-
Draw a text zone around the area that
contains the unwanted box.
The Zone Properties window is displayed.
-
Give a descriptive name to the zone so it is easy to understand its purpose.
For example,
Repeating pattern removal
. -
On the
Image Cleanup tab, click the
Properties button in the
Image Cleanup group.
The Image Cleanup Profile window is displayed.
-
On the
Add Image Cleanup Method window, click
Add and then select
Advanced Despeckle from the list.
The Image Cleanup window displays the Advanced Despeckle settings in the bottom right pane and loads the image into the top two panes for testing cleanup.
- Adjust the zoom level and view of the image so the zone that contains the repeating pattern is fully visible inside the viewer.
-
Set all settings to zero.
This removes everything from the image displayed in the "After running cleanup" viewer so you can easily figure out the pixel sizes of the repeating pattern.
- Start increasing the Width (pixels) Max. field until the repeating pattern you want to remove is deleted from the image. Record and label this number on a piece of paper so you can reference it later at a later time.
- Reset all settings to zero and start increasing the Width (pixels) Min. field until the repeating pattern is fully displayed on the image. Record and label this number on a piece of paper so you can reference it at a later time.
-
Reset all settings to zero and start increasing the
Height (pixels) Max. field until the repeating pattern you want to remove is
deleted from the image.
Record and label this number on a piece of paper so you can reference it later at a later time.
-
Once again, reset all settings to zero. This time, start increasing the
Height (pixels) Min. field until the repeating pattern is fully displayed on
the image. Record and label this number on a piece of paper so you can reference it later at a later time.
You should now have four numbers. Two for the width, and two for the height.
- Type the recorded numbers into their respective fields.
- Optionally, increase the Separation (pixels) value if content that is needed is removed.
- Optionally, adjust the mass and proportion values to further refine image cleanup.
- Optionally, if there are more than one types of repeating patterns, repeat steps 6 through 15 to add another layer to remove the different pattern.
- Test the OCR results.
- Save the changes to your project.
The following images show how multiple Advanced Despeckle image cleanup methods can be layered to remove multiple repeating patterns:
The following image shows how a second Advanced Despeckle image cleanup method can be layered to remove an additional repeating gif pattern:
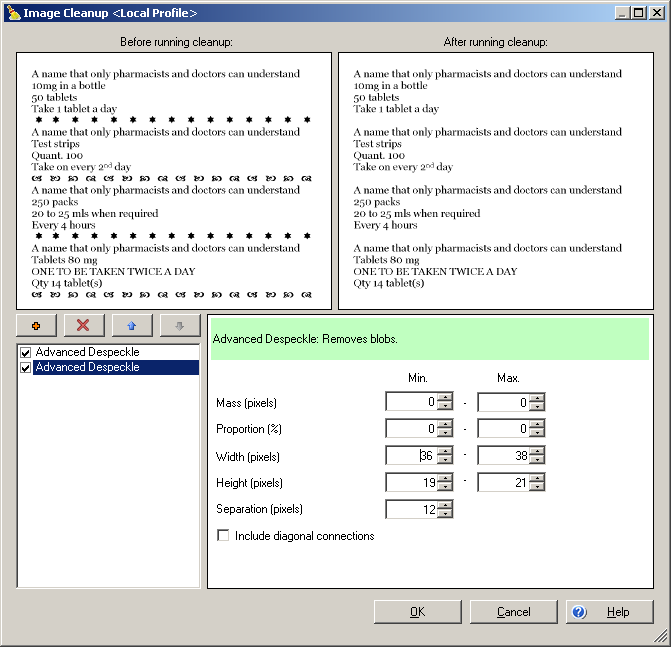
After these image cleanup methods are applied, the OCR results are improved as follows:
A name that only pharmacists and doctors can understand
lomg in a bottle
50 tablets
Take 1 tablet a day
A name that only pharmacists and doctors can understand
Test strips
Quant. 100
Take on every 2"d day
A name that only pharmacists and doctors can understand
250 packs
20 to 25 mls when required
Every 4 hours
A name that only pharmacists and doctors can understand
Tal)lets 80 mg
ONE TO BE TAKEN TW[CE A DAY
Qty 14 tablet(s)